• 2 Bags Ghirdardelli Classic White Chocolate Chips (11oz.) • 1 Package Golden Oreos • 1/2 Cup Pumpkin Puree • 6oz. Cream Cheese (Softened) • 1/2 Tsp Cinnamon
Directions
Using a food processor, grind the package of Golden Oreos until finely ground.
Mix all ingredients, except the white chocolate chips, together in a bowl until smooth. Chill the mixture for 25 minutes.
Begin rolling the chilled mixture into small balls the size of a ping-pong ball, and set aside on a baking sheet. Freeze the balls for 25 minutes.
Following the melting instructions on the back of the package, melt the white chocolate chips in a small sauce pan over the stovetop. Remove the balls from the freezer and dip each ball into the mixture using a fork, lightly tap the fork to remove any excess chocolate.
As soon as the chocolate coating dries, they are ready to serve!
I love going to BIGLOTS this time of the year there is loads of great Halloween and pumpkin decor! Now I like to check out their DIY section online too, I found a few good recipes to try out:
Ingredients: • 3 – 29 oz. Cans pumpkin puree • ¾ Cup apple juice • ½ tsp. Ground ginger (optional) • ½ tsp. Ground cloves • 1 Cup brown sugar • 1 Tbsp. ground cinnamon • ½ tsp. Ground nutmeg • ½ tsp. Vanilla extract
Direction:
Combine all ingredients in the slow cooker, and stir well.
Cook covered on low for 7 hours.
Cook uncovered for 30 minutes, stirring occasionally.
Adjust spices to taste.
Transfer pumpkin butter to a blender or food processor, and process until smooth. Store in the fridge.
Well this spice is now running off the shelf and it just got here for the fall! You are in luck if you need some for those autumn recipes and can’t find any at the store. There are plenty recipes online but I chose http://www.loveandlemons.com their recipe seem to be the right amount for you if you only need for a few recipes:
Ingredients
2 tablespoons ground cinnamon
1 tablespoon ground ginger
1 teaspoon nutmeg
½ teaspoon ground cloves
½ teaspoon allspice
Instructions
In a small bowl, combine the cinnamon, ginger, nutmeg, cloves, and allspice.
Store in a air tight container to use for the rest of the season!
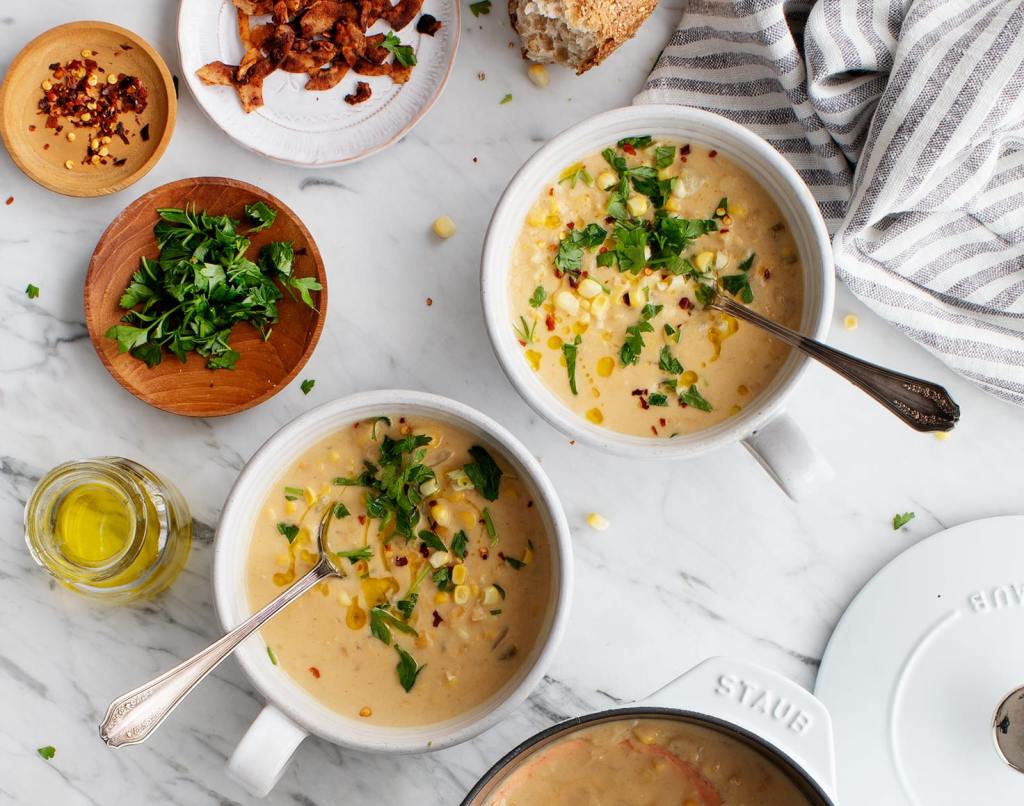
Someday when the hot summer goes away and let’s the fall evening start coming in here is something yummy to look forward too! Our friends over at loveandlemons.com have some awesome soups to warm you up:
Heat the olive oil in a large pot over medium heat. Add the onions and a generous pinch of salt and pepper and cook until softened, stirring occasionally, about 8 minutes. Add the smashed garlic cloves (they’ll get blended later) and chopped carrots to the pot and cook about 8 minutes more, stirring occasionally.
Stir in the ginger, then add the apple cider vinegar, and then add 3 to 4 cups of broth, depending on your desired consistency. Reduce to a simmer and cook until the carrots are soft, about 30 minutes.
Let cool slightly and transfer to a blender. Blend until smooth. Taste and adjust seasonings. Add maple syrup, if desired.
Serve with a drizzle of coconut milk and/or a dollop of pesto, if desired.
Heat 2 tablespoons olive oil in a large pot or Dutch oven over medium heat. Add the onion, salt, and several grinds of pepper. Sauté 6 to 8 minutes, until softened.
Add the garlic, stir, and cook 2 more minutes. Stir in the white wine vinegar and cook, stirring, for 30 seconds, and then add the broth, potatoes, and white beans. Bring to a boil, reduce the heat, and simmer 30 minutes.
Let cool slightly, then transfer half of the soup to a blender with the remaining 1 tablespoon olive oil, the mustard, lemon juice, and paprika. Blend until smooth and return the pureed soup back to the pot.
Use a potato masher to gently smash the potato chunks and beans. Season to taste with more salt and pepper and serve with desired toppings.
Make the cashew cream. Combine the cashews, water, and salt in a blender and process until very smooth. Set ¾ cup aside.
Heat the oil in a large pot over medium heat. Add the onion and celery and cook, stirring occasionally, for 5 to 7 minutes, until the onion is tender and translucent. Add the garlic and cook, stirring constantly, for 1 minute.
Stir in the broth, split peas, potato, corn, paprika, and salt and bring to a boil over high heat. Lower the heat, cover, and simmer, stirring occasionally, for about 45 minutes, until the split peas are completely tender.
Use an immersion blender to partially puree the soup, or puree about half of it in a regular blender and return it to the pot. Stir in the Cashew Cream and apple cider vinegar. Taste and adjust the seasonings if desired. (I added up to 1 teaspoon more sea salt here). Serve piping hot, with any desired toppings.
So our friends over at Tajin added another dessert recipe with a twist. Pineapple, mango, apple turnover with tajin? If you love your tajin I think this is worth trying out:
4 each pie crusts, use prepared refrigerated crusts (9-inch) or make your own
Topping Ingredients
1/4 cup powdered sugar 1 tablespoon Tajín Clásico
Combine all ingredients EXCEPT Tajín, cornstarch and water.
Cook over low heat stirring frequently until reduced to 1 1/2 cups / .33 liter.
Make a slurry of the cornstarch and water and stir into filling. Bring to a boil and cook until thickened (1 – 2 minutes).
Remove filling from heat, remove cinnamon stick and cool to room temperature.
Stir in Tajín.
Roll out prepared pie crusts and cut eight 3-inch circles from each. If you wish you can roll out the scraps and cut more circles until you don’t have enough dough to make any more.
Place 1 teaspoon / 5 ml of filling on each circle. Fold in half and seal the edges by pressing down with a fork all the way along the edges.
To help keep the filling inside the dough follow this technique. Imagine a line drawn across the center of each circle and place your filling with 2/3s of it above the line.
Then fold from the top down. This will help keep the filling inside the dough. Start pressing the two edges from the center out to the fold in one direction and then the other.
Preheat oven to 350F / 175 C.
Bake until crust is golden (about 20 – 25 minutes).
Combine powdered sugar and Tajín.
Dust turnovers with powdered sugar and Tajín mixture immediately upon removing from the oven.
Store in a single layer in an airtight container at room temperature.
If you have ever been to an authentic Mexican Food restaurant you have tried this before. I can only have the carrots and onions not the serrano peppers I would die! If you have the time and love to add spice to your dishes try out this family recipe:
Ingredients
4 cups of water
4 cups of white vinegar
3 garlic cloves
7 carrots sliced
2 onions sliced
5 whole serrano peppers
1 tbsp of salt
1 tbsp black peppercorns
1 tbsp marjoram
6 whole bay leaves
Instructions
Boil water, slice carrots and onions ahead of time. Add water and vinegar in a 1 gallon mason jar. Add garlic cloves, onion, carrots, and serrano mix all the ingredients well with a wooden spoon. Add spices and mix well again cover and find a nice spot on your counter for the jar to sit for a week. You can leave out and it will keep getting spicer by the day eat within a month.
Want to make a great treat at home to have the whole family on a sugar rush pralines is the way to go. Learn to make these it’s fast and easy but careful not to make a mess. There are many different recipes from original to all different nuts and added butters base recipe is the same. I tried macadamia honey nut butter and also pumpkin seed butter with sea salt that was my favorite:
INGREDIENTS
1 1/2 cup white sugar
3/4 cup packed light brown sugar
1/2 cup milk (Vegan plant base milk)
6 tbsp unsalted butter, (Vegan butter)
2 cups pecan pieces (use any other nut you like)
2 tbsp pumpkin seed butter (see below)
1 tsp vanilla extract
Sea salt for topping
INSTRUCTIONS
1. Set out parchment paper for making the pralines 2. Melt butter on medium heat use a wooden spoon. Add milk and vanilla extract, to the center add the brown and white sugar do get any on the sides stir regularly until it begins to foam and boil. 3. Add pecans when it begins to foam and boil, stir constantly don’t let any sugar get on the sides of the pot. 4. Keep stirring until it reaches 238 to 240 degrees use a candy thermometer wait for it to reaches “soft ball” mark. 5. Remove from heat stir in pepita butter until it’s all mixed together once the cold air starts getting into mix it will start to thicken. 6. Quickly drop scoopful on parchment paper and allow them to cool and firm. If the mixture is too thin and spreads more than you want, stir a little bit more. If the mixture starts to cool too much as you’re scooping, place it back on the warm burner (but don’t turn it on) and let it keep the mixture warmer. Sprinkle with sea salt. 7. When pralines are cool and firm, store in an airtight container.
Ingredients for pumpkin butter
1 cup raw pumpkin seeds
1-2 teaspoons olive oil
1 pinch sea salt
Instructions
Process the raw pumpkin seeds in a blender or food processor until you achieve a creamy consistency. Depending on the power of your blender it can take up to 5-8 minutes, make sure to scrape down the sides once in a while.
Add all other ingredients and only pulse briefly.
Enjoy
Note use any other butter instead of pumpkin or use chocolate 3 oz added after you remove from heat.
So pumpkin season is back everything pumpkin all around for the next few months, so why not have a yummy vegan pumpkin donut!! The recipe calls for sugar cinnamon topping but we tried it with chocolate too. This recipe is from http://www.veganhuggs.com they always have great recipes to try out. And since we want to keep up with pumpkin season we will check out a few more recipes on their site:
Ingredients
Wet Ingredients
1/2 cup soy milk (or any plant-based milk – *see note)1/2 cup soy milk (or any plant-based milk – *see note)
1 1/2 teaspoons apple cider vinegar (sub white vinegar or lemon juice)1 1/2 teaspoons apple cider vinegar (sub white vinegar or lemon juice)
1 cup pumpkin puree (not pumpkin pie filling)1 cup pumpkin puree (not pumpkin pie filling)
1/2 cup granulated sugar1/2 cup granulated sugar
1/3 cup brown sugar , light1/3 cup brown sugar , light
1/3 cup grapeseed oil or any neutral-flavored oil (avocado, sunflower, etc.)1/3 cup grapeseed oil or any neutral-flavored oil (avocado, sunflower, etc.)
Preheat oven to 350 °F (177 °C) and lightly grease the slots of two donut pans.
In a Medium Mixing Bowl, add the soy milk and apple cider vinegar. Combine and let it sit for 10 minutes to create vegan buttermilk. It will thicken and curdle slightly. Set aside.
To a Large Mixing Bowl, add the Flour, Corn Starch, Baking Powder, Baking Soda, Pumpkin Spice, and Salt. Whisk to combine well. Set aside.
To the Medium Bowl with the Buttermilk, add the Granulated Sugar, Brown Sugar, Oil, Pumpkin, and Vanilla. Whisk to combine well.
Now add the wet ingredients into the large bowl of dry ingredients. Fold batter gently with a spatula until just combined. The batter should be thick. Don’t overwork the batter or it can cause dense and chewy donut.
Using a spoon add your batter to a large Ziploc or decorating bag. Twist top closed and snip off one corner leaving a 1/2 ” hole (*hold the bag upwards when cutting so the batter doesn’t leak out). Pipe the batter into your greased donut pans. Fill about 3/4 of the way full.
Place in the oven on the middle rack for 12-15 minutes. To check for doneness, lightly press the surface. If it springs back, they are ready.
Remove the pans from the oven and let them cool for 10 minutes before touching (but don’t leave them longer than that). Now gently remove the donuts and let them completely cool on a cooling rack for 10-15 minutes before coating.
Cinnamon Sugar Coating
In a small bowl, whisk to combine the sugar and cinnamon.
Lightly brush the top of each donut with melted butter and dip into the cinnamon sugar. Gently twist to coat. Enjoy!
Notes
I prefer soy milk because it thickens and curdles really well with the vinegar, making it closest to dairy buttermilk. However, you can use any plant-based milk of your choosing. Donuts are freshest the same day, but they will store in an airtight container for 2-3 days. Place a paper towel underneath and on top of the donuts to absorb moisture. FREEZING: You can freeze them in an airtight container or Ziploc for 2-3 months. To thaw, leave them out at room temp for 20-30 minutes. You can also wrap them in a moist paper towel and microwave them for 20-30 seconds.
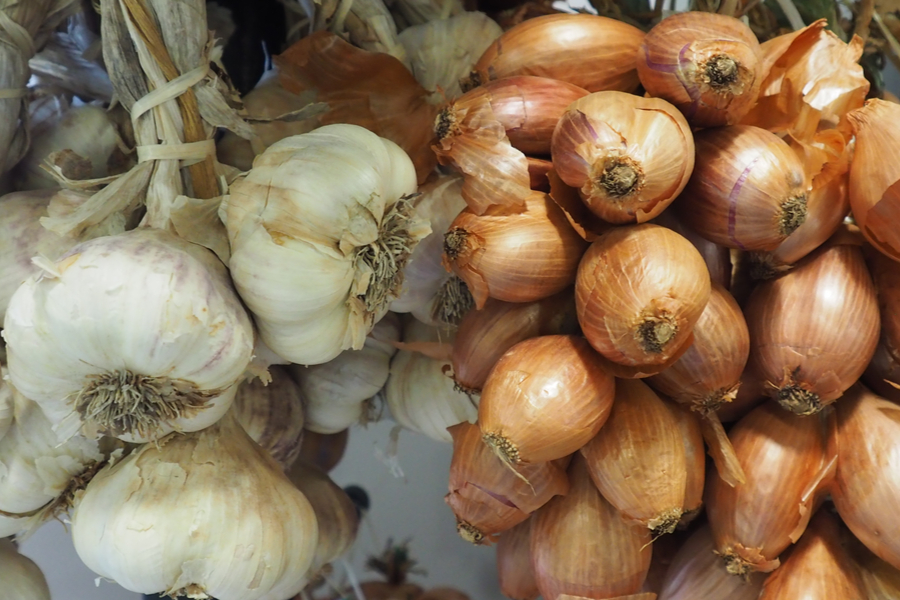
Every kitchen needs to always be stocked with garlic and onions for all the recipes. So if you don’t want to ever be caught without start growing them at home. Check out step by step from http://www.oldworldgardenfarms.com:
Fall is the perfect time for planting a delicious crop of garlic and onions in your garden! And with just a little work now, you’ll be rewarded with a bountiful harvest early next summer. Although both garlic and onions can be planted and grown as traditional spring crops, an early Autumn planting has several advantages.
It’s hard to beat the flavor of home grown garlic and onions. And the two crops just happen to be one of the easiest of all to grow.
For one, fall planting allows each plant to grow a larger, more robust bulb come harvest time. But even better, overwintering these two crops also helps to develop better flavor in the bulbs – as if they both weren’t already tasty enough!
And let’s face it, you can never have enough delicious homegrown garlic or onions on hand. In fact, we use at least one or both everyday, whether it’s for fresh-made dishes, or as ingredients in tried and true recipes like our homemade garlic pasta sauce or overnight garlic pickles.
Planting a fall crop of garlic and onions is an annual ritual at the farm. And one that yields a delicious crop of both the following summer.
And that is exactly why planting our fall crop is important! Here is a look at how we plant both onions and garlic, along with a few secrets we have learned along the way to growing a successful crop.
3 Big Secrets For Planting Fall Garlic & Onions
#1 Plant The Right Way – At The Right Time!
When planting a fall crop of garlic and onions, it’s important to get your bulbs in at just the right time. For both, that means planting to allow 6 to 8 weeks of growth before the cold of winter sets in and they go dormant.
That growing time is critical for both crops, as it allows them to set their roots for strong growth in the spring.
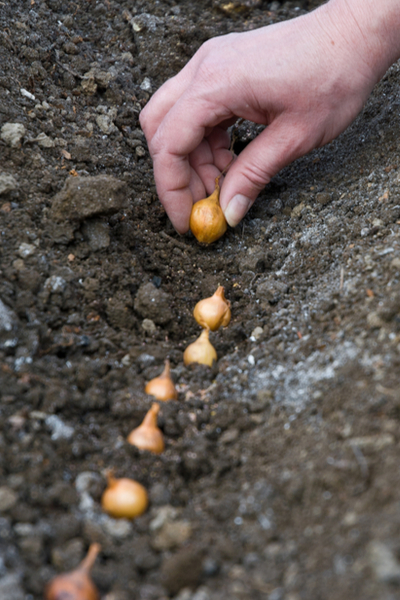
Whether it’s onions or garlic, always plant with the tip of the bulb facing up.
Here on our little Ohio farm, we usually plant during the first week of September. But wherever you live, simply count back 6 to 8 weeks from when your fall frost / freeze dates occur, and plant accordingly.
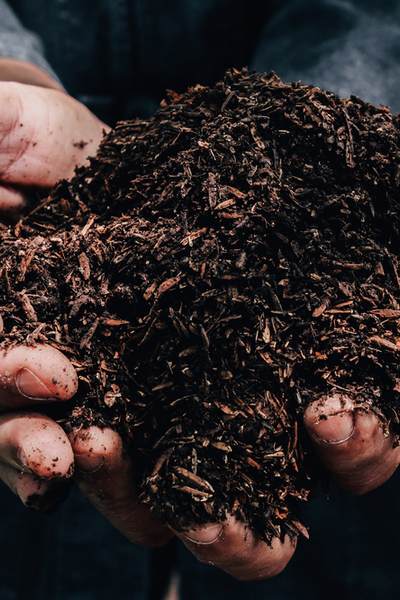
Great Soil = A Great Crop
For maximum growth, it is critical for both crops to have fertile, well draining soil. It not only allows bulbs to grow larger, but keeps them from rotting in the sometimes overly wet conditions of late fall and early spring.
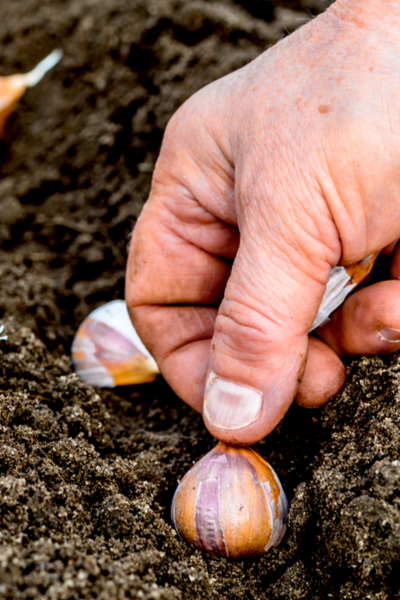
Before planting fall garlic or onions, add in generous amounts of compost to the bottom of each planting furrow. The compost will provide both the nutrients and improved drainage the bulbs need to thrive.
Adding in generous amounts of compost to the planting row is a must.
To accomplish this, we first dig our furrow, and then add about an inch of compost into the bottom of the trench. Then we plant the bulbs down into the layer of compost. This allows the seed to be surrounded by life-giving nutrients as it sprouts and grows.
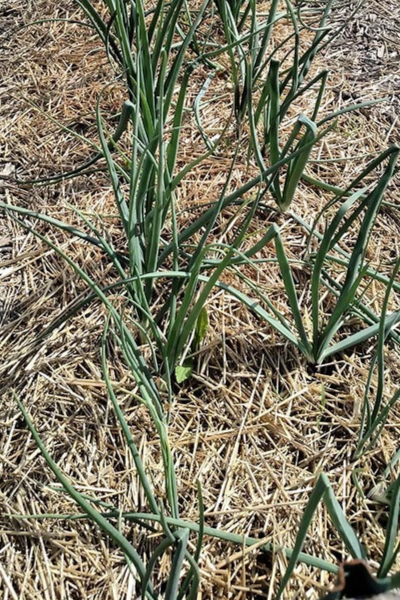
Both garlic and onions can be planted in rows, but they can be grouped closer than you might think no matter how you plant. In our 18″ wide raised rows, we plant both crops 3-wide down each row, with 4″ spacing between bulbs.
This closeness not only helps conserve space, but also helps to keep weeding and maintenance to a minimum. In a single 20′ long bed, we can grow close to 80 heads of garlic or onions.
We allow about 4″ between bulbs when planting. The gives plenty of space for bulbs to mature to full size.
As for the depth of planting, we plant our garlic bulbs 3″ deep, while the onions go in at 2 inches. And remember when planting – always plant with the pointy tip of the bulb facing up.
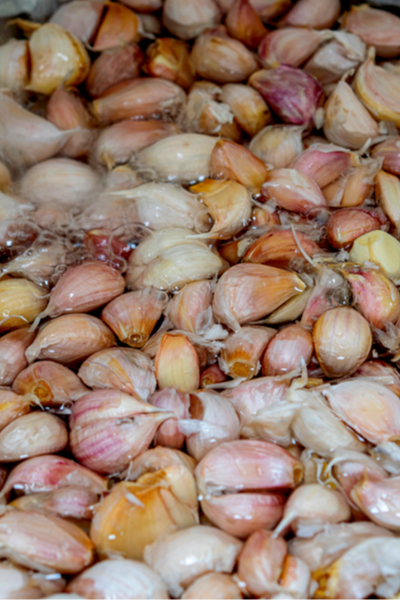
#2 Soak Before Planting – How To Plant Fall Garlic & Onions
One of the best things you can do to get your onion and garlic crops off to a great start is to soak them before planting.
Soaking allows the bulbs to absorb moisture before heading into the ground. And without moisture, bulbs simply won’t sprout.
To soak, simply fill up a 5 gallon bucket of water the night before planting and dump the bulbs in. Be sure to use water that is not treated as it can actually harm the bulbs.
The simple task of soaking bulbs can speed up sprout times by a week or more!
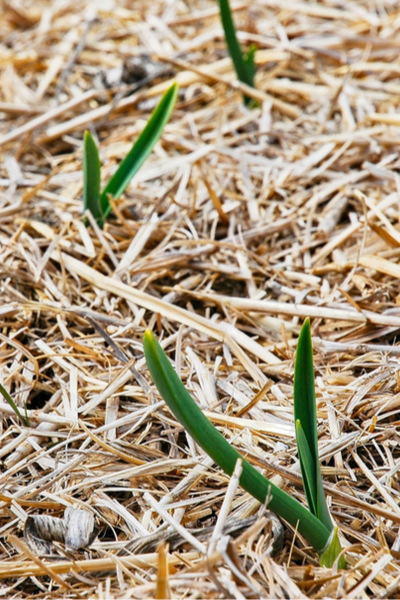
#3 Mulch Those Crops – How To Plant Fall Garlic & Onions
And perhaps the biggest secret of all for a great crop is to mulch that crop! Not only does it help protect the crop through winter, it also keeps competing weeds at bay.
Mulching is critical for both weed control and for regulating the soil temperature through the cold winter months.
After planting, place a thin 1″ mulching of straw on top of your crop. Once crops have emerged, apply an additional 3 to 5 inches of mulch before winter sets
This will help to protect each of the crops from the harsh winter temperatures and winds. Once spring arrives, simply add a bit of fresh mulch to top of the rows, and get ready for a great early summer harvest!