10 INCREDIBLE EPSOM SALT USES FOR YOUR PLANTS & GARDEN

SOURCE: https://www.naturallivingideas.com/epsom-salt-for-garden-plants/

I always love finding new uses for ordinary household items, especially when it comes to gardening because it could cost money to maintain. Epsom salt not only good for you but also has several uses in organic gardening for healthy plants.

1. IMPROVE SEED GERMINATION

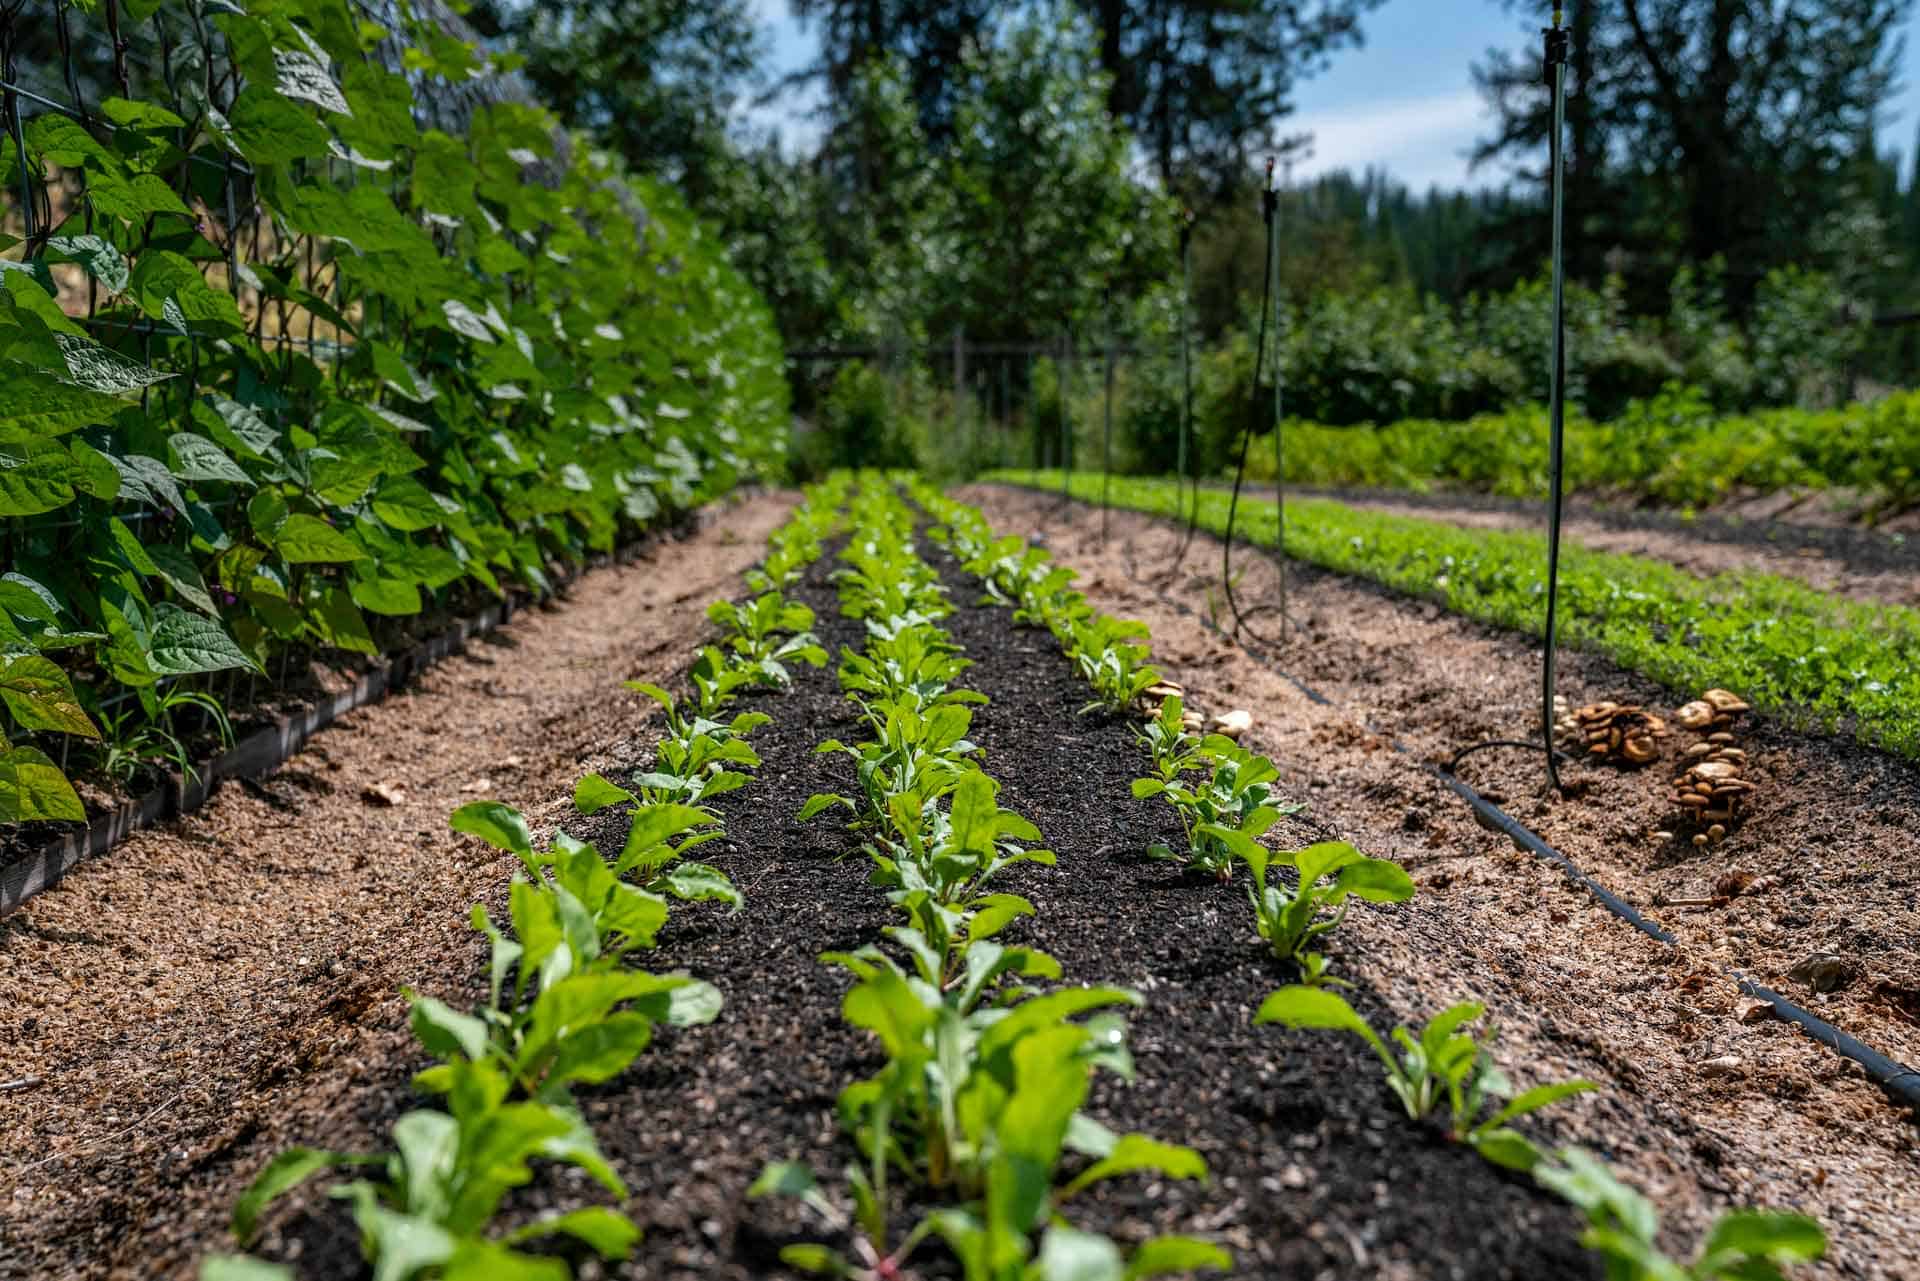
Using Epsom salt as a soil amendment before seeding will give your garden a powerful boost right from the start. Magnesium aids in seed germination and helps to strengthen cell walls, leading to more and stronger seedlings.

For best results, incorporate 1 cup of Epsom salt per 100 square feet of tilled soil or mix 1 – 2 tablespoons into the soil at the bottom of each hole before dropping in seeds.

2. INCREASE NUTRIENT ABSORPTION

Many commercial fertilizers add magnesium to help plant roots take up vital nutrients (nitrogen, phosphorus, sulfur.) For those using all organic materials to feed their gardens, adding Epsom salt to soil will improve absorption naturally, eliminating the need for processed chemical fertilizers.

3. COUNTER TRANSPLANT SHOCK

Wilted sprout seedlings

We’ve all seen how our plants and seedlings wilt when we move them from a small pot to a larger one, from indoors to outside, or from greenhouse to ground. Try feeding transplants with Epsom salt once they’re in their new environment to help injured roots overcome transplant shock.

Remember to add a layer of soil on top of salt sprinkled in holes so roots don’t come into direct contact with these concentrated minerals right away.

4. GREEN UP FOLIAGE

Plants that aren’t getting enough magnesium can be identified by their yellowing leaves. This is because magnesium is an essential component in the production of chlorophyll. Try sprinkling Epsom salt around your plants to achieve healthier foliage.

About 1 tablespoon per 12 inches of height once a month will benefit the plants in your vegetable garden, as well as any trees, shrubs, flowers and grasses you want to green up.

5. PREVENT LEAF CURLING

Magnesium deficient plant

Leaf curling may also be caused by magnesium-deficiency in plants. Again, add Epsom salt to the soil around the base of the sick plant.

Alternately, for faster absorption you can mix 2 tablespoons of Epsom salt in a gallon of water and apply directly to the leaves.

6. DETER GARDEN PESTS

While Epsom salt won’t dehydrate slugs and snails like table salt (sodium chloride), it can still be used to deter pests. Hydrated magnesium sulfate crystals are sharp and when sprinkled around plants, they can scratch and irritate the bodies and feet of unwanted critters in much the same way as diatomaceous earth.

(Keep in mind that Epsom salt dissolves very easily in water, thus any amount of rain will likely wash them away.)

7. GROW SWEETER FRUIT

The production of fruiting bodies is the most taxing process in the life cycle of a plant. Apply Epsom salt to fruit and nut trees, bushes, and vines using the same methods and quantities stated above to boost chlorophyll levels inside the plant cells.

Increased energy means more sugar, allowing the plant to produce higher yields of sweeter, healthier fruit.

8. TASTIER TOMATOES

Ripe tomatoes on vine

Tomato vines are one of a handful of common garden residents whose fruit to plant size ratio is heavier than average, leading to an even higher likelihood of magnesium-deficiency. For this reason, tomatoes should be fed Epsom salt twice as often as other plants.

Also, because tomato vines are prone to calcium-deficiency (blossom end rot), the majority of tomato fertilizers contain calcium which will compete with magnesium for root absorption. Therefore, foliar feeding is the more efficient method for delivering magnesium to these plants.

Water tomato vines with dissolved Epsom salt – 2 tablespoons per gallon of water, every 2 weeks.

9. MORE PLENTIFUL PEPPERS

Peppers are another popular garden plant with a higher-than average fruit to plant size ratio. As such, they should also be fed magnesium every two weeks to achieve higher yields of larger fruits. For hot peppers, over-watering can lead to fruit with less heat, thus the soil amendment method may be preferable in this case.

Sprinkle 1 tablespoon of Epsom salt for every foot of height around the drip line of your pepper plants once per week.

10. BEAUTIFUL, BOUNTIFUL ROSES

Not only does it help roses to produce larger blossoms in greater numbers, many successful rosarians will agree that magnesium also aids in the growth of new canes from the base of the plant. And of course, Epsom salt increases chlorophyll production meaning darker leaves. For maximum benefit, roses should at the least be fed with Epsom salt at time of planting, then again at the first sign of new growth, and once more when the flowers are in full bloom. Bare root roses may also be soaked in water containing dissolved Epsom salt before planting.

It is almost impossible to use too much Epsom salt in your garden. Magnesium sulfate is pH neutral, so it won’t harm your soil. The crystals break down into water, magnesium, and sulfur – three components which are beneficial in some way to most plants.

Epsom salt is safe, easy to apply, and works fast to correct a variety of problems and increase the overall health of your garden.

As if that weren’t enough, Epsom salt is also inexpensive making it one of the most perfect tools for the health-conscious, responsible gardener.

Check out https://www.naturallivingideas.com for even more gardening tips!

20 Vegetables You Can Plant in Late Summer

SOURCE: https://homesteadingfamily.com/20-vegetables-to-plant-in-late-summer/

Thinking it’s too late to grow a home garden not if you check out homesteadingfamily.com page. They have answers for all your questions to be about growing a garden in the later months of the year.

Even if you didn’t get a spring garden planted, there is still time, late summer, to plant vegetables and harvest them before the first frost. A late summer garden means you can harvest fresh produce well into fall and sometimes even into winter. Here are 20 vegetables that grow well when planted in late summer.

What Vegetables Can You Grow in Late Summer?

Though it’s a bit early yet to be thinking about spring garden planning, or even how to start seeds indoors. There’s still a small window of time that you can plant more vegetables to harvest before winter.

Many plants will grow well when planted in late summer and will continue growing well into the late fall and early winter. Others, still, will winter over and start growing first thing in the spring.

Another favorite tip for growing into the shoulder seasons (or even all year long in front of a sunny window) is to plant an instant garden using a vertical tower garden.

What vegetables can you still plant in late summer?

  1. Beets
  2. Carrots
  3. Radishes
  4. Rutabagas
  5. Turnips
  6. Peas
  7. Bush Beans
  8. Cauliflower
  9. Broccoli
  10. Cabbage
  11. Chard
  12. Kale
  13. Spinach
  14. Mustard Greens
  15. Lettuce
  16. Arugula
  17. Sorrel
  18. Bok Choy
  19. Mescalin Mix
  20. Cilantro

Succession Planting

Even in early spring we like to use succession planting to stagger our harvest. Because we’re planting in such large volumes, if we don’t do this we’ll be overwhelmed once harvest time rolls around.

By planting a little bit each week, this means we’re able to eat fresh all season long, and we’re also harvesting in stages so not ALL of one crop is ready at one time.

Use a Garden Planner

In order to successfully grow a late summer garden for a late fall harvest you need to know when your first average frost date is. Then, working backwards accordingly, you’ll know which crops you’ll be able to get into the ground in order to harvest before the frost hits.

We love using Clyde’s Garden Planner. If you don’t have a garden planner, pick one up as they’re an invaluable resource that’s very inexpensive (use code: HOMESTEADINGFAMILY for a discount!).

Root Vegetables to Plant Late Summer

As mentioned above, there are quite a few root crops you can plant and harvest before the ground freezes. Certain varieties even do quite well when you leave them in the ground and cover them heavily with mulch.

If you plant beets in late summer, be sure to plant them densely and harvest the leafy greens as you thin the plants out.

Certain varieties of carrots actually get sweeter if they’re left in the ground once winter hits.

Other root vegetables like radishes are pretty fast growing and you’ll have plenty of time to harvest for fresh eating throughout the remainder of the growing season.

Always check your seed packets for the growing window as well as how well the variety handles cold. Even within a specific vegetable, there will be varieties that do better growing into the winter season.

Peas & Bush Beans to Grow in Late Summer

Peas will be happy through a light frost, however beans will need to get in and harvested before a frost as they don’t handle the cold as well.

It’s also better if you plant a bush bean variety, not a pole bean.

Our kids love planting the dragon tongue beans and they’re a great variety to grow!

Brassicas You Can Plant in Late Summer

When planting brassicas you’ll want to be sure to check the length of time they need to grow to maturity.

For cauliflower, there are some quicker varieties you can grow, so choose accordingly!

For broccoli, a sprouting broccoli will be best. They won’t grow those large crowns we’re used to seeing for broccoli, but you’ll get a lot more side sprouts. These are also wonderful because they’ll die back and winter over, then it will be one of the first things you’ll see come back in the garden come springtime.

Cabbages do great when planted in late summer as they can handle the winter cold much better than other vegetables. We specifically love the Chinese cabbages and they’ve done very well for us in the past.

As always, check the seed package or the catalog for a variety that does well with colder temperatures. 

Leafy Greens

Leafy greens are wonderful because they grow up so quickly and can be harvested young as microgreens if you don’t have time to let them grow to full maturity.

Some greens like kale and spinach can handle colder temperatures quite well.

But what we love about lettuces is that, when planted densely, they will grow upright and be very easy to harvest. We’ve found that leafy greens will continue to feed our family well into the winter, especially when we utilize our greenhouse to extend the growing season.

There you have it! 20 vegetables that you can still grow, even in late summer!

Do keep in mind that these are the vegetables we can grow here in the far north of Idaho. If your climate is more mild, you’ll likely have a larger list of vegetables that you’ll still have time to get in the ground and harvest before the weather turns too cold.

Coconut Cold Brew Ice Pops

SOURCE: https://www.traderjoes.com/recipes/desserts/coconut-cold-brew-ice-pops#.XydX-gZLjpw.email=0A=0ATo

Now if you have some cold brew left over here is a few recipe from trader joe’s. Not only can you pick up great groceries at a great price but now they have a whole recipe section too online! Coconut Cold Brew Ice Pops for when you need to wake up and stay extra fresh!

INGREDIENTS

  • 6 Tablespoons TJ’s Shredded Sweetened Coconut, divided
  • 1 ¾ cup TJ’s Non-Dairy Coconut Beverage (Vanilla Flavor), divided
  • 1 ½ cups TJ’s Coconut Cold Brew Coffee Concentrate (or original TJ’s Cold Brew Coffee Concentrate)
  • 3 teaspoons TJ’s Organic Coconut Sugar
  • You will also need 12 wooden craft sticks, 12 small square pieces of foil and 12 small paper cups to use as molds

DIRECTIONS

Arrange 12 paper cups on a small tray. Sprinkle ½ tablespoon of shredded coconut in the bottom of each cup. Pour 1 Tablespoon of coconut milk into each cup and swish until the shredded coconut is completely saturated. Place tray of cups in the freezer for at least 1.5 hours or until layer solidifies.

Meanwhile, in a small pitcher combine remaining 1 cup of coconut milk, 1.5 cups of cold brew and 3 teaspoons of sugar. Stir, cover and set aside.

Once the coconut milk layers are solid, remove tray from freezer and add about 3 tablespoons of your cold brew mixture to each cup. Cover each cup with foil and puncture with a wooden craft stick down the center. Stick the pops in the freezer for about six hours. Peel the paper away and enjoy!

Coconut Cold Brew Coffee

SOURCE: https://www.bonappetit.com/recipe/coconut-cold-brew-coffee

For all the cold brew drinkers out there here is yet another twist for giving your coffee a little extra taste. Coconut cold brew, infused in a different way than just adding coconut creamer:

Ingredients

16 oz. coffee beans (about 4 cups), coarsely ground
1½ cups toasted unsweetened shredded coconut
3 cups milk (cow’s, oat, or nut) or water
2 Tbsp. (or more) pure maple syrup or agave syrup

Preparation

  • Place coffee and coconut in large bowl, jar, or pot.
  • Slowly pour in 8 cups cool water and stir very gently until grounds are just moistened.
  • Cover and chill 24 hours.
  • Strain coffee grounds through a fine-mesh sieve into a large measuring glass or bowl.
  • Discard grinds.
  • Line sieve with a coffee filter and add as much coffee as will fit.
  • Strain gradually into a 1-qt. airtight container or jar, adding more coffee as space is available until all the coffee has been added.
  • Allow grounds to sit in strainer and continue to drip 20 minutes.
  • To serve, pour ½ cup coffee into an ice-filled glass; add ½ cup milk and 1 tsp. maple syrup and stir to combine.

Vegan Lemon Cupcakes

SOURCE: https://veganhuggs.com/vegan-lemon-cupcakes/

Came across this lovely recipe and definitely need to try it out looks amazing! Thank you veganhuggs.com for this and all the lovely notes that are added:

LEMON CUPCAKES

  • 1 3/4 cups all-purpose flour (*see notes)
  • 1.5 teaspoons baking powder
  • 1/2 teaspoon baking soda
  • 3/4 teaspoon salt
  • 3/4 cup soy milk or preferred milk or preferred milk
  • Zest of 1 lemon
  • 1 tablespoon fresh lemon juice (*zest lemon before juicing)
  • 1/3 cup grapeseed oil or any neutral-flavored oil (avocado, sunflower, vegetable, etc.)
  • 1/3 cup plain non-dairy yogurt (sub applesauce)
  • 1 cup granulated sugar
  • 1 teaspoon vanilla extract
  • 2 teaspoons lemon extract

LEMON BUTTERCREAM FROSTING

  • 1 cup vegan stick butter , slightly softened at room temp (about 10-15 minutes)
  • 3.5 cups powdered sugar , sifted
  • Zest of 1 lemon
  • 2 tablespoons lemon juice (*zest lemon before juicing)
  • 1/2 teaspoon vanilla extract

Instructions

LEMON CUPCAKES

  • Preheat oven to 350 ° F (177 ° C). Place 12 muffin liners in a standard muffin pan.
  • In a medium mixing bowl, whisk the soy milk and lemon juice together. Set aside about 5 minutes.
  • In a separate large mixing bowl, add the flour, baking soda, baking powder, and salt. Whisk to combine well.
  • To the medium bowl with the buttermilk, add the oil, yogurt, lemon zest, vanilla extract, lemon extract, and sugar. Whisk to combine well.
  • Now add the wet ingredients into the large bowl of dry ingredients. Whisk gently until just combined (some small lumps are fine). Don’t overwork the batter or it can cause dense and chewy cupcakes that won’t rise well.
  • Pour mixture into each liner evenly about 2/3 the way full (an ice cream scoop works great for this). Don’t overfill.
  • Place in the oven on the middle rack for 18-22 minutes until lightly golden. To check for doneness, lightly press the surface – It should spring back. Don’t over bake or they will be dry.
  • Remove the pan from the oven and let them cool for 5-10 minutes before touching. Now gently remove the cupcakes and transfer them to a cooling rack. Let completely cool before decorating with frosting.

LEMON BUTTERCREAM FROSTING

  • Add the softened vegan butter to the bowl of a Stand Mixer (or use a large bowl with a Hand Mixer). Cream the butter on medium for 3-5 minutes until pale, airy, and fluffy (turn to med-high for 10-second intervals if needed). Scrape down sides as needed.
  • Over low speed, add the vanilla extract, lemon juice, lemon zest, and a 1/2 cup of powdered sugar. Mix until the sugar is almost combined. Scrape down sides as needed. Now beat for 60 seconds on Medium-High until fully incorporated.
  • Repeat the process with 1/2 cup of sugar at a time until it’s gone and the frosting is thick, smooth, and fluffy. Add more sugar if you want a sweeter taste or thicker consistency. If the buttercream is too thick or stiff, add a few teaspoons of non-dairy milk and mix until fully incorporated.

Notes

Measuring Flour: don’t scoop it with a measuring cup directly from the flour container. Instead, Aerate it first, then scoop it out of your container with a large spoon and then into a measuring cup. Don’t tap or pack the cup, just lightly sweep a butter knife across the top to remove the excess flour.

For a successful baking experience, measure all of the ingredients accurately, and follow the instructions closely. Making any changes can yield undesired results. Also, make sure that the baking soda and baking powder aren’t expired. If your oven runs too hot/cool, it can yield different results. I highly recommend an oven thermometer to ensure the temp is accurate.

Soy Milk: I prefer soy because it curdles the best and creates the perfect vegan buttermilk. However, feel free to use any plant-based milk you prefer.

Vegan Butter: I prefer to use stick butter because it yields consistent results. Some tub varieties contain more moisture and can cause the frosting to become runny. If you use tub butter, you won’t have to soften it first. You may need to add more sugar to keep it firm. Don’t overbeat it or add any additional moisture. 

Powdered Sugar: Using organic powder sugar will ensure that it is vegan.

Frosting: It can stay out at room temperature for a few hours without melting, so you can leave decorated cakes/cupcakes out. However, if it’s too hot, the frosting will start to soften. I prefer to store decorated cupcakes in the fridge (in a container) and take them out an hour before serving. This helps set the buttercream and keeps the cupcakes moist.

Storing: Without frosting, they will stay fresh covered at room temperature for a couple of days. You can also store them frosted or unfrosted in the fridge for up 3-5 days. You can freeze them with or without. frosting for 2-3 months. To thaw, leave them out at room temp. for 15-20 minutes. 

Online Classes

SOURCE: https://picjumbo.com/wp-content/uploads/baking-ingredients-1570×1047.jpg

For everyone that loves to cook and can follow a recipe but sometime prefers to see how it’s done first here you go. These are a few of the classes I have taken sometimes to get the technique right or just to learn something new. Whichever you want to do here are a few options of some cool classes that are not too expensive and all are virtual:

Virtual Doughnut Making

SOURCE: https://coursehorse.com/nyc/classes/cooking/baking/more-baking/pastry/virtual-doughnut-making

Learn to make your own donuts at home $35 for 2 1/2 hr class.

Virtual Croissant Making

SOURCE: https://coursehorse.com/nyc/classes/cooking/baking/more-baking/pastry/virtual-croissant-making

This one I did and you really get a workout making croissant, the class is two days but the first day is how to make and prepare the second is just to bake. The class is worth the money again $35 if you really want to attempt to make croissants!

Virtual Bread Baking 101

SOURCE: https://coursehorse.com/nyc/classes/cooking/baking/bread/virtual-bread-baking-basics

In this online class will guide you through several classic breads, from ingredients to kneading techniques. And who doesn’t need to practice kneading dough. Also $35

Virtual Class: Beignet French Donuts

Students will learn to prepare delicious fried puff pastries while understanding how to use yeast dough, baking and frying. For those with a real sweet tooth, add a variety of extra sweet fillings to the beignets such as home-made chocolate and fruits. 2 hr class for $40 https://coursehorse.com/nyc/classes/cooking/dessert-pastry/virtual-class–beignet–french-donuts-

Virtual Bagel Making

SOURCE: https://coursehorse.com/nyc/classes/cooking/baking/bread/virtual-bagel-making

Learn to make bagels! Make, shape, boil and bake, even make a roasted garlic-chive cream cheese at the end of this two-hour class. Another $35 well spent!

There are many different classes to choose from these are just a few and not only cooking on this website all other discover classes as they call it! https://coursehorse.com check it out.

Special Notes this class is not offered thru coursehorse but I came across this class and got super excited:

ZOOM COOKING CLASS: PRALINES

SOURCE: https://neworleansschoolofcooking.com/zoom-cooking-classes

This class is 1 hr 30 mins learn to make original pralines, chocolate pralines and peanut butter pralines. The class is offered thru New Orleans School Of Cooking my nephew took a class onsite when he was visiting last year. $32.50 per person but it sells out fast! They have a few other classes but really had to try this one first!

10 Healthy Herbs You Can Grow in Water

SOURCE: https://gardeningsoul.com/10-healthy-herbs-you-can-grow-in-water/

Have you seen those 5 min craft videos and wonder if some of the stuff they do is real? Well growing herbs in water to start a garden is, and it’s pretty easy. http://www.gardeningsoul.com has 10 healthy herbs you can grow in water to start:

Put some herb cuttings in glass bottles with plain water, and it is best to use spring water if possible, as it is high in minerals. You should not use chlorinated water, as the bleaching chemical can damage the plant tissues. You should leave some tap water to air overnight or store some rainwater.

Choose a glass bottle, a mason jar, or even a plastic bottle for the herbs. Yet, use colored bottles or warp a piece of paper around the bottle as the roots should not be exposed light.

The darkness will help you avoid algal growth on the bottle and on the root. The narrow-mouthed containers support the cuttings and keep them upright.

Yet, avoid narrow or tight-fitting ones as the mouth of the container should support a free transition of air for the roots to be able to breathe.

You should pick soft cuttings roots, and cut some 6-inch sections from the growing herbs. Put them in the containers and remove the lower leaves as they can rot in the water and spoils it.

You can change the water once a week in the case of herbs like rosemary cuttings. As soon as the roots start growing, within 2-6 weeks, you do not need to change the water.

To stimulate the rooting, place some willow branches in warm water overnight, and then use them as a soothing hormone mixture. You can use some rooting hormone powder as well.

Rosemary – The root of the semi-woody cuttings of rosemary need more time, but the new shoots in the spring grow faster. Keep the plant in a sunny spot.

Sage – You should take some sage cuttings in the spring and place them in water. Place the herb on a bright spot in a well-aerated place as it is prone to mildew.

Peppermint – This herb is high in the volatile substance menthol which provides a cooling sensation on the skin or tongue and does not change the temperature. Just put a few fresh cuttings in water, as it is the easiest herbs you can grow in water.

Tarragon – You need some spring cuttings after new growth appears, and place the herb on a warm and bright place. Tarragon can be of various types, and the French one is best for culinary purposes while the Russian is better to be used for salads.

Basil – This herb is easily grown in water. Place the cuttings in water before they start flowering and place the container in a sunny place.

Spearmint –Peppermint is a natural hybrid of spearmint and it is easily grown in this way.

Thyme – Take some newly grown, green cuttings, in the mid-spring or early summer before the thyme starts flowering, place them in water, and spray the parts which are under the water to avoid its drying. As soon as it is grown, cut the stems to boost branching.

Oregano – Place the fresh cuttings of oregano in water and pinch the growing tips as the herb grows.

Lemon balm – You should pick several cuttings in spring or fall, and place them in water in a bright spot. After 3-4 weeks, the cuttings will develop roots. Change the water often, or you can keep the plant outdoor if the weather is warm. You can prepare tea from the leaves.

Stevia – You can add stevia to some beverages and teas. Just place some stevia cuttings from actively growing branches in a container full of water, and keep it in a sunny and warm place.

Aarke – CARBONATOR II

SOURCE: https://www.aarke.com/us/carbonator-2#93=5431

Do you like having a glass of sparkling water with your meal, keeping the frig stocked with Perrier or Pellegrino can be costly. Well now the brand Aarke has something special for you. The Aarke carbonated water machine requires no batteries or electricity. You can make 1 litter of sparkling water at home. Just fill the bottle with cold water, screw the bottle into the machine, pull the lever down and that’s it! You will need a CO2 canister which is what carbonates the water, and you turn in when you get a refill canister. I looked a few place and mostly everywhere is the same price this will run you $219, but it’s stainless steel (other colors available). No more carrying or storing those heavy bottles, or drinking only half and throwing out the rest because it’s flat. I got me one and I love it!

Find your at https://www.aarke.com/us/retailers or just go on amazon they have everything including the canisters!

Raw Pumpkin Seed Butter

SOURCE: https://thehealthytart.com/raw-pumpkin-seed-butter-recipe/

Have you ever been to the store and see every nut butter on the shelf but the one you want? Not a problem anymore because once you start making your own nut butter no nut is safe! We already tried pistachio butter, peanut butter, almond butter so pumpkin seed is next on the list. Found this quick recipe at http://www.thehealthytart.com and it’s awesome:

Ingredients

1 cup raw pumpkin seeds

1-2 teaspoons olive oil

1 pinch sea salt

Optional:

  • 2 teaspoons maple syrup
  • 1 teaspoon vanilla extract
  • 1/4 teaspoon ground cinnamon

Instructions

  1. Process the raw pumpkin seeds in a blender or food processor until you achieve a creamy consistency. Depending on the power of your blender it can take up to 5-8 minutes, make sure to scrape down the sides once in a while.
  2. Add all other ingredients and only pulse briefly.
  3. Enjoy

***Notes

Optional: You can roast the pumpkin seeds in the oven for 10-12 minutes at 175°C before processing them. This will give them a lovely roasted flavour, but you would lose out on a few nutrients during the process.