Strawberry Love

Summer is coming in we need to start finding great summertime recipes to enjoy with the family, and strawberry is one of the berries always available! Check out these great recipes form http://www.williams-sonoma.com:

Strawberry and Pistachio Yogurt Tart

Ingredients

For the crust:

  • 1 egg yolk
  • 1 Tbs. water
  • 1/2 tsp. almond extract
  • 3/4 cup (4 oz./125 g) all-purpose flour
  • 1/2 cup (2 oz./60 g) almond flour
  • 1/3 cup (3 oz./90 g) sugar
  • 1 tsp. ground cardamom
  • 1/2 tsp. kosher salt
  • 8 Tbs. (1 stick) (4 oz./125 g) cold unsalted butter, cut into cubes


For the filling:

  • 3 eggs
  • 1 cup (8 oz./250 g) whole-milk Greek yogurt
  • 1/3 cup (3 oz./90 g) sugar
  • 1 tsp. vanilla extract
  • 1/2 tsp. kosher salt


For the topping:

  • 2 Tbs. water
  • 2 Tbs. sugar
  • 1/8 tsp. ground cardamom
  • 3 cups (12 oz./375 g) strawberries, halved through the stem end
  • 2 Tbs. finely chopped pistachios
  • 1 Tbs. finely grated lemon zest

Directions:

To make the crust, in a small bowl, whisk together the egg yolk, water and almond extract. Set aside.

In the bowl of a stand mixer, using a handheld whisk, whisk together the all-purpose flour, almond flour, sugar, cardamom and salt. Attach the bowl to the mixer and fit with the flat beater. With the mixer on low speed, add the butter and beat until pea-size pieces form, 1 to 2 minutes. Slowly stream in the egg yolk mixture and beat until the dough just comes together, 1 to 2 minutes.

Turn the dough out onto a work surface and shape into a disk. Wrap with plastic wrap and refrigerate until firm, about 1 hour.

Roll out the dough into a 13-inch (33-cm) round about 1/8 inch (3 mm) thick. Fold the dough round in half and carefully transfer to a 10-inch (25-cm) tart pan with a removable bottom; pat it firmly into the bottom and up the sides of the pan. Refrigerate the tart shell for 30 minutes.

Meanwhile, preheat an oven to 375°F (190°C).

Prick the bottom of the dough all over with a fork. Bake until the crust is starting to set on the bottom, about 20 minutes. Transfer to a wire rack and let cool slightly while you prepare the filling.

To make the filling, in a bowl, whisk together the eggs, yogurt, sugar, vanilla and salt. Pour into the warm crust and bake until set, about 15 minutes. Transfer the pan to a wire rack and let cool to room temperature, then cover and refrigerate for at least 4 hours or up to overnight.

To make the topping, in a small saucepan over medium-high heat, combine the water, sugar and cardamom and bring to a boil, stirring to dissolve the sugar. Remove from the heat and let cool to room temperature.

To finish the tart, arrange the strawberries decoratively on top of the tart as desired. Brush the strawberries lightly with the cardamom syrup (you may not need all of it). Sprinkle with the pistachios and lemon zest, cut the tart into slices and serve. Serves 8.

A touch of cardamom adds layers of flavor to both the crust and the simple syrup that’s brushed over the fruit. Keep in mind that the baked tart needs to be refrigerated for at least 4 hours or up to overnight.

Williams Sonoma Test Kitchen

Fresh Strawberry Ice Cream

Ingredients:

  • 3 cups half-and-half
  • 6 egg yolks
  • 1 cup sugar
  • Pinch of salt
  • 2 cups sliced strawberries
  • 1 tsp. vanilla extract

Directions:

In a saucepan over medium heat, warm the half-and-half until steam begins to rise from the surface, 4 to 5 minutes.

In a heatproof bowl, whisk together the egg yolks, sugar and salt until blended. Gradually add the hot half-and-half, whisking constantly until fully incorporated. Transfer the mixture to a clean saucepan and set over medium-low heat. Cook, stirring constantly with a wooden spoon or spatula, until the custard is thick enough to coat the back of the spoon and leaves a clear trail when a finger is drawn through it, 8 to 10 minutes; do not allow the custard to boil.

Pour the custard through a fine-mesh sieve set over a clean bowl and stir in the strawberries and vanilla. Nestle the bowl in a larger one filled halfway with ice and water and cool the custard to room temperature, stirring occasionally. Refrigerate until cold, at least 1 hour.

Transfer the custard to an ice cream maker and freeze according to the manufacturer’s instructions. Transfer the ice cream to a freezer-safe container. Cover and freeze until firm, at least 3 hours or up to 3 days, before serving. Makes about 1 quart. 

Prepare this ice cream at the peak of strawberry season, from April to June, when the berries will have an intensely sweet aroma and flavor. If you can find the wild strawberries known as fraises des bois, use this variety.

Williams-Sonoma Kitchen.

Extra recipe for Strawberry Jam

Fresh Strawberry Jam Recipe

4 cups finely chopped strawberries

1 cup sugar

1 large lemon

Place berries with sugar and the juice and zest from the lemon into a heavy bottomed pot over medium heat.  Cook stirring often until mixture has reduced almost in half and has thickened.  Store jam in a clean jar for up to 2 weeks in the refrigerator. 

Pro Tips:

If you can’t eat this much jam in 2 weeks, freeze a portion to be enjoyed at a later time.

Berries will get sweeter as the season progresses, cut back on the sugar to taste.

Celebrate Earth Day Everyday

Celebrate Earth Day not just today but everyday in all you, get your family to be more aware of what they can change up to help the planet. Recycling, composting, using household items again and again, here are 22 activities to help you get on track, thanks to blog.constellation.com:

  1. Analyze your personal impact on the planet. As you start to consider Earth Day activities for work or at home, start by taking a long, hard look at your current energy usage. There may be some simple ways that you can create a more sustainable lifestyle.
  2. Be an advocate. Write letters to local politicians to voice your support for environmental causes. Sign online and offline petitions that support the environmental needs of your local community and the world as a whole.
  3. Lend a hand to a local eco-friendly charity. Volunteer your time to help support local efforts to protect the environment. They may need people to staff tables at events, manual labor during planned Earth Day activities, or other support.
  4. Sign up for a class. There are lots of local Earth Day activities for adults that feature classes on recycling, gardening, composting, and more. Check with local environmental organizations to see what is available in your area.
  5. Plant a tree. While this seems one of the simplest Earth Day project ideas, the act of planting a tree has so many benefits. You’re creating a new habitat for wildlife, helping to clean the air, and replacing resources that have been used.
  6. Start a garden. Gardening has lots of benefits that help to give back to the earth. Adding gardening to Earth Day activities for adults will help you to clean the air, eat sustainably, and even help reduce erosion.
  7. Have a dinner party. Invite your friends over and serve local, organic foods for a delicious, nutritious meal that features sustainable, healthy options while you chat about Earth Day activities. For work, you can have a potluck lunch, with the rule that everyone’s dish must be farm-to-table food.
  8. Join a cleanup. There are lots of Earth Day activities that involve cleaning up parks, beaches, river and stream banks, and more.
  9. Go on a hike. Spend some time simply getting outdoors and remembering why it’s so important to celebrate Earth Day and protect our world.
  10. Donate art or craft projects. Create Earth Day-inspired arts and crafts, then donate your efforts to local events to help raise funds for eco-conscious activities.
  11. Clean out a closet. Everyone has some usable items lying around that have been forgotten. Clean out a closet and donate gently used things to local charities to give them new life.
  12. Go dark for a day. Commit to unplugging from electronics and all non-essential appliances and devices for a day. Get back to basics and participate in some Earth Day activities that are completely environmentally friendly.
  13. Change your light bulbs. While changing a light bulb doesn’t sound like one of the most exciting Earth Day activities for adults, switching to CFL or LED lighting options can have a great impact on energy use.
  14. Patronize local sustainable businesses. Support the businesses who are supporting our earth. Research the environmental practices of local companies, and spread the word in your community about the ones which truly give back to the environment.
  15. Develop a company initiative. While one day of Earth Day activities for work is a start, think a little bigger. Create a recycling program, look for opportunities to reduce power consumption, or come up with other ways that can reduce your company’s carbon footprint all year long.
  16. Build a home or work recycling center. Organize your garbage disposal area to easily sort recycling as one of your Earth Day activities. For work, get permission to purchase the supplies needed to create a recycling station, and encourage coworkers to participate.
  17. Find a festival. Many communities host Earth Day festivals and activities. These events can be a great source of fun — plus give you lots of wonderful Earth Day project ideas.
  18. Educate yourself. Read a book, subscribe to a blog, watch a documentary, or attend a seminar that will help to educate you on environmental issues on which you aren’t up to speed.
  19. Go solar. Though converting your entire home to solar power might not be an affordable endeavor, changing outdoor lighting to solar options or purchasing a solar charger for your phone or other handheld electronics can make a small dent in your energy consumption.
  20. Organize a carpool. Carpooling is one of the best Earth Day activities. For work, errands, shopping trips and more, choosing to ride with a friend to reduce vehicle emissions and fuel consumption has benefits that add up quickly.
  21. Cut back on plastic. Walk around your home and see what kind of disposable plastics you are using and where they can be replaced with reusable options, then go out and purchase reusable water bottles, grocery bags and other containers while recycling the more wasteful options.
  22. Challenge your friends. Do your part to get your friends involved in Earth Day activities by issuing a challenge. Extend it for weeks, months and even through the year to see who can accomplish the most to give back to the planet.

There are hundreds of Earth Day activities in which you can participate, all of which are important to making our earth a better and healthier place to live. We hope you’ll find some of our suggestions useful and celebrate Earth Day with us!

National Pet Day

Today is National Pet Day how will you and your fur kids celebrate? Here are 10 ways you can share the special day with the special fur friends thanks to http://www.petsafe.net:

1. Share a day at the dog park Dog parks may be nothing new to you and your pup, but spend a little extra time meeting new friends today. You’ll feel like an awesome pet parent and truly appreciate your pet as he frolics around the park finding new playmates. If you don’t have a dog park to visit in your area, we might be able to help. And remember you can walk your cat too! Visit www.petsafe.net/barkforyourpark for more information.  

2. Treat yourself to ice cream This is a special treat. It’s not every day your dog gets sweet vanilla ice cream (and it shouldn’t be every day). You don’t have to share the same ice cream cone, but get your pup a little frozen treat at a drive through. After all, National Pet Day only comes around once a year.

3. Give your pet a bath Your pet may not like this one, but the after effect will be awesome. The soft fur feeling your pet has after the big water shake off is amazing. Having a bath also really helps with our next idea…

4. Have a pet photo shoot  Moose’s first photo shoot!  After your kitten or puppy has dried off and looks cuter than ever, take pictures! You have no idea how much these will mean to you as you grow up together. The more pictures the better for National Pet Day.          

5. Get a special treat National Pet Day is a chance to spoil your pet without any guilt. Pick up that product you know your pet will love, and you have just been waiting for the right time to get it. This day is a celebration!

6. Take a nap together cat naps take on a new meaning on National Pet Day. Relax and treat both of you to a bonding nap. Soak up the sun outside or snuggle inside for the perfect afternoon pick-me-up.  There’s nothing quite like a Moose nap

7. Split a meal It is starting to be patio season, and we think that’s reason enough for a fur family dinner. Take your pup to a doggie-friendly restaurant patio and spilt a meal you will both love.

8. Watch a pet movie remember Air Bud? What about Homeward Bound or Marley and Me? Dig up your old favorite pet movies and watch them together. Hey, they understand the barking parts!

9. Throw a ball this is so simple but will go such a long way. Your dog has been cooped up all winter, and it’s time to play. So pick up his favorite toy and step outside for a change.

10. Give some extra love only you know the best way to show your pet you care. Whether it is a longer belly rub, some playful exercise or simply an extra hug, the best way to Celebrate National Pet Day is bonding with your pet.

Donuts, Donuts, Donuts Baked Not Fried

SOURCE: Credit: Bryan Gardner

Who says you have to wait for National Donut Day to have one, no worries here are a few good recipes from Martha to help you out. Try one or all see which you like best or maybe just to prepare for National Donut Day! Best part all recipes are for baked donuts not fried. And for all the vegan friends that hate spending 3 times the amount for a vegan donut, no worries we got you covered too. If you want more recipes just type in donut on search at top right you will pull up a few more donut recipes we have tried out:

Baked Cake Donuts Recipe | Martha Stewart

Ingredients

Ingredient Checklist

  • 1/2 cup (1 stick) unsalted butter, room temperature, plus more for pans
  • 2 1/2 cups unbleached all-purpose flour
  • 1 1/2 teaspoons baking powder
  • 1/4 teaspoon baking soda
  • 1/8 teaspoon freshly grated nutmeg
  • 3/4 teaspoon kosher salt
  • 1/2 cup granulated sugar
  • 1/4 cup light brown sugar
  • 2 eggs, room temperature 
  • 1 teaspoon pure vanilla extract
  • 1 cup whole milk, room temperature

Directions

  1. Preheat oven to 425 degrees. Lightly brush two standard donut pans with butter. In a medium bowl, whisk flour, baking powder, baking soda, nutmeg, and salt; set aside.
  2. In the bowl of a stand mixer fitted with the paddle attachment, or in a large bowl with a hand mixer, beat butter and sugars on high speed until light and fluffy, about 3 minutes. Reduce mixer speed to medium; add eggs and vanilla, beating until combined, scraping down the sides of the bowl as needed. Reduce speed to low. Add flour mixture in two batches, alternating with milk, and beat just until combined.
  3. Transfer batter to a piping bag or a resealable plastic bag, and snip a 1/2-inch hole in one corner of bag. Divide mixture evenly between prepared pans. Bang pans several times on counter to release air bubbles.
  4. Bake until tops of donuts spring back when lightly pressed, 12 to 14 minutes. Let cool 10 minutes, then transfer to a wire rack to cool. To decorate, see Variations below.

Variations

Powdered

In a bowl, gently toss warm donuts in 1 cup confectioners’ sugar until evenly dusted. Transfer to a wire rack to cool completely; reserve bowl with sugar. Toss cooled donuts in sugar again until thoroughly coated.

Glazed
Let donuts cool completely. Mix 1 cup confectioners’ sugar with 2 tablespoons whole milk; tint with gel food coloring, if desired. Dip top of each donut in glaze (donut should be halfway submerged), turning as needed to evenly coat. Transfer to a wire rack. Top with sprinkles; let dry completely.

Coconut
Let donuts cool completely. Mix 1 cup confectioners’ sugar with 1/4 cup whole milk. Dip donuts completely in glaze to coat, then use a fork or chopstick to transfer to a wire rack. Sprinkle with toasted shredded coconut; let dry completely.

Baked Chocolate Cake Donuts Recipe | Martha Stewart

Ingredients

Chocolate Glaze

  • 3/4 cup mini chocolate chips (6 ounces)
  • 1 cup confectioners’ sugar, sifted
  • 1/4 cup natural cocoa powder, sifted
  • 1/4 teaspoon kosher salt
  • 2 tablespoons unsalted butter, room temperature
  • 1/2 cup heavy cream, plus more if needed
  • 1 teaspoon pure vanilla extract

Donuts

  • 1 stick unsalted butter, room temperature, plus more for pans
  • 2 cups unbleached all-purpose flour
  • 1/3 cup natural cocoa powder
  • 1 1/2 teaspoons baking powder
  • 1/4 teaspoon baking soda
  • 1 teaspoon kosher salt
  • 1/2 cup granulated sugar
  • 1/2 cup packed light-brown sugar
  • 2 large eggs, room temperature 
  • 1 1/2 teaspoons pure vanilla extract
  • 1 cup whole milk
  • 1 cup mini chocolate chips (8 ounces)
  • Sprinkles or chocolate shavings (optional)

Directions

  1. Preheat oven to 425 degrees. Lightly brush 3 standard donut pans with butter.
  2. Whisk together flour, cocoa, baking powder, baking soda, and salt.
  3. Beat butter with both granulated and brown sugars on high speed until light and fluffy, about 2 minutes. Add eggs, one at a time, beating to combine after each addition. Beat in vanilla. Reduce speed to low; add flour mixture in two batches, alternating with milk, beating to combine after each addition. Stir in chocolate chips.
  4. Transfer batter to a piping bag fitted with a large, plain tip (such as Ateco #807), or to a resealable plastic bag, then snip a 1/2-inch hole in one corner. Pipe 3 tablespoons batter into each cup in pans.
  5. Bake until tops spring back when lightly touched, 10 to 11 minutes. Let cool in pans 10 minutes, then transfer to wire racks set in rimmed baking sheets and let cool completely.
  6. Dip top of each donut in glaze until halfway submerged, turning as needed to evenly coat one side. Place, glaze-side up, on racks. Top with sprinkles or shavings and let stand until completely set, about 1 hour.
  7. Donuts are best served the day they are made, but can be stored, unglazed, in an airtight container at room temperature up to 1 day; glaze 1 hour before serving.

Chocolate Glaze: Combine chocolate, confectioners’ sugar, cocoa, salt, and butter in a small bowl. Heat cream in a small pot over medium-high until bubbling around edges, 1 to 2 minutes. Pour hot cream over chocolate mixture; let stand 1 minute. Add vanilla and whisk until mixture is smooth and has the consistency of hot-fudge sauce. If it’s too thick, add more cream, 1 tablespoon at a time. (Makes 1 1/3 cups.)

Variations

You can skip the chocolate glaze and spread the tops of the donuts with store-bought dulce de leche instead.

Vegan Baked Banana Donuts Recipe | Martha Stewart

Ingredients

Vegan Chocolate Glaze

  • 2 1/4 cups confectioners’ sugar
  • 1/3 cup natural cocoa powder
  • Pinch of kosher salt
  • 4 to 5 tablespoons almond or cashew milk, plus more if needed 
  • 4 teaspoons light corn syrup

Donuts

  • 1/2 cup unrefined coconut oil, room temperature (solid), plus more for pan
  • 2 tablespoons ground flaxseeds
  • 2 cups unbleached all-purpose flour
  • 1 teaspoon baking soda
  • 1 teaspoon kosher salt
  • 1/3 cup unsweetened almond or cashew milk
  • 3/4 cup mashed very ripe banana (from 2 bananas) 
  • 1 cup granulated sugar
  • Chopped toasted pecans or pistachios (optional)

Directions

  1. Preheat oven to 425 degrees. Lightly brush 3 standard donut pans with oil.
  2. Sprinkle flaxseeds over 1/3 cup water; let stand until slightly thickened, about 5 minutes. Whisk together flour, baking soda, and salt.
  3. In another bowl, whisk together almond milk and banana. Beat oil with granulated sugar on medium-high speed until creamy, about 2 minutes. Beat in flaxseed mixture. Reduce speed to low and beat in flour mixture in two batches, alternating with milk mixture.
  4. Transfer batter to a piping bag fitted with a large plain tip (such as Ateco #807), or to a resealable plastic bag, then snip a 1/2-inch hole in one corner. Pipe about 3 tablespoons into each cup of pans.
  5. Bake until tops spring back when lightly touched, about 10 minutes (1 to 2 minutes less if pan isn’t full). Let cool in pans 10 minutes, then transfer to wire racks set in rimmed baking sheets and let cool completely.
  6. Dip top of each donut in glaze until halfway submerged, turning as needed to evenly coat one side, then place, glaze-side up, on racks. Sprinkle with nuts; let stand until glaze is set, about 1 hour.
  7. Donuts are best served the day they are made, but can be stored, unglazed, in an airtight container at room temperature up to 1 day; glaze 1 hour before serving.

Vegan Chocolate Glaze: Whisk together confectioners’ sugar, cocoa, and salt. Whisk in 4 tablespoons milk and corn syrup until mixture is smooth and has the texture of thick, pourable honey. If needed, add more milk, 1 teaspoon at a time, until mixture reaches desired consistency. (Makes 1 1/2 cups.)

Recipes Straight From Candace Nelson!!

Who doesn’t love cupcakes, brownies, and cookies but getting them from the Sprinkles bakery is a real treat. Now imagine getting the recipes straight from the creator of Sprinkles Candace Nelson herself! Check out her website https://candace-nelson.com you can find recipes, blog post, and all the baking related things going on with Candace. Find links to her Cupcake MBA Bootcamp and also her The Pie Pop-Up online baking course for everyday bakers (and even non-bakers!) who are ready to learn the art and joy of pie making. And if you want more recipes check out her books on amazon.com:

COCOA BROWNIES WITH MINT GANACHE

INGREDIENTS


For the brownies:
1/3 cup all purpose flour
1/3 cup unsweetened cocoa powder
1/4 tsp fine sea salt
1/2 cup (1 stick) butter, plus more for greasing
3/4 cup granulated sugar
1 tsp pure vanilla extract
2 eggs
2 ounces bittersweet chocolate


For the mint ganache:
4 tbsp coconut oil
2 tbsp heavy cream
4 sprigs fresh mint
6 ounces white chocolate, chopped


DIRECTIONS

  1. Preheat the oven to 350°F. Butter a 9 x 9-inch square baking pan; set aside.
  2. Into a medium bowl sift the flour, cocoa, and salt; set aside.
  3. In another medium-sized, microwave-safe bowl combine the butter and chocolate and microwave on high, stopping and stirring every 45 seconds, until melted and smooth, 2-3 minutes total.
  4. Cool slightly, whisk in the sugar and, then whisk in the eggs until incorporated. Gradually add the dry ingredients to the wet until well blended.
  5. Make the ganache:
  6. In a small saucepan bring the coconut oil, cream, and mint to a simmer. Remove from the heat, cover and let steep for at least 30 minutes or up to 4 hours, more, depending on your preferred level of mint intensity.
  7. In a small microwave-safe bowl melt the white chocolate, stirring every 30 seconds until smooth, 1-2 minutes.
  8. Remove the mint sprigs from the heavy cream and whisk the warm cream into the melted chocolate until emulsified.
  9. Spread evenly over the brownies and chill until the ganache hardens, 30 minutes. Cut into 16 equal-sized brownies.

CHEWY CHOCOLATE CHIP COOKIES

INGREDIENTS


2 ¼ cups all-purpose flour
1 tsp baking soda
1 tsp salt
1 cup (2 sticks) unsalted butter, melted and still warm
1 1/4 cup granulated sugar
1/4 cup packed brown sugar
1 tsp pure vanilla extract
1 large egg plus 2 large egg yolks
2 cups semisweet chocolate chips


DIRECTIONS

  1. In a medium bowl mix together the flour, baking soda, and salt; set aside.
  2. In a stand mixer fitted with paddle attachment cream the butter and sugars on medium speed until fluffy and smooth, 2-3 minutes. Turn off the mixer and scrape down the sides of the bowl with a spatula. Turn the mixer on low speed, add the vanilla and eggs, and beat until well combined.
  3. Gradually add the flour mixture and beat until just incorporated, turning the speed up to medium-high or high for a short period if necessary to bring the mixture together. Using a spatula, fold in the chocolate chips.
  4. Wrap in plastic wrap and refrigerate ideally overnight, but at least a few hours.
  5. Preheat oven to 350°F. Line 2 baking sheets with parchment paper.
  6. Scoop portions of ¼ cup and roll into round balls. Place on the baking sheets, with space in between; do not press down.
  7. Bake until the tops are golden brown, 11-12 minutes. Cool slightly, then transfer to tacks to cool completely.

FUDGY BROWNIES

INGREDIENTS


6 tbsp European-style butter, such as Plugrá, plus more for greasing
1 cup sugar
1 tsp pure vanilla extract
1/4 tsp fine sea salt
1/4 cup all-purpose flour
6 ounces bittersweet chocolate, chopped
2 large eggs


DIRECTIONS

  1. Preheat the oven to 350°F. Generously butter the bottom and sides of an 8-inch square pan and line the pan with two strips of parchment paper that fit the pan both vertically and horizontally, leaving a 2-inch overhang on all sides.
  2. In a small bowl, combine the sugar and salt.
  3. In a medium microwave-safe bowl, microwave the butter and chocolate on high for 2 to 3 minutes, stopping every 45 seconds to stir until melted and smooth.
  4. Stir in the sugar mixture until blended.
  5. Whisk in the eggs one at a time until fully incorporated, then whisk in the flour and vanilla until the mixture is smooth and glossy.
  6. Pour the batter into the prepared pan and bake until the top is set and slightly shiny (the brownies should not spring back when pressed), 25 to 26 minutes.
  7. Transfer the pan to a wire rack, cool completely, and cut into 16 equal-size squares.

ORANGE CRANBERRY CUPCAKES

INGREDIENTS


For the cupcakes:
1/2 tsp pure vanilla extract
1/2 cup (I stick) butter, softened
1 cup granulated sugar
1 egg plus 2 egg whites
1 cup frozen cranberries (not thawed), or fresh if you can find
1 1/2 cups plus 1 tablespoon all purpose flour
1 tsp baking powder
1/4 tsp baking soda
1/4 tsp fine sea salt
2/3 cup whole milk
2 tbsp finely grated orange zest (from 2 large oranges)


For the Frosting:
1 cup (2 sticks) unsalted butter, slightly softened
3 cups confectioners sugar
1/8 tsp fine sea salt
1 tsp whole milk
1 tbsp orange juice
1 tbsp lightly packed finely grated orange zest
1/8 tsp pure vanilla extract


DIRECTIONS

  1. Make the Cupcakes
  2. Preheat oven to 325°F. Line a 12-cup cupcake pan with cupcake liners; set aside.
  3. In a medium bowl whisk the flour, baking powder, baking soda, and salt; set aside.
  4. Toss the cranberries with the 1 tablespoon of flour and set aside.
  5. Add the milk and orange zest to a small saucepan and heat over low heat until hot (but not boiling); let cool until lukewarm, 4-5 minutes. Stir in the vanilla.
  6. In the bowl of a stand mixer fitted with the paddle attachment cream the butter and sugar on medium-high speed until light and fluffy, 2-3 minutes, scraping down the sides of the bowl if necessary. Reduce speed to low, add egg and egg whites, and beat until creamy, 1-2 minutes.
  7. Slowly add half of the flour mixture, then the milk mixture, then the remaining flour mixture, beating after each addition until just blended and scraping down the sides of the bowl if necessary. Turn off mixer and gently fold in the cranberries by hand.
  8. Divide the batter evenly among the prepared cupcake cup and bake until the tops are just dry to the touch (some may be slightly golden on the sides before this happens), 18-19 minutes.
  9. Cool completely before frosting with the Orange Frosting.
  10. Make The Frosting
  11. In the bowl of a stand mixer fitted with the paddle attachment beat the butter, sugar, and salt on medium speed until light and fluffy, 2-3 minutes.
  12. Add the milk, lemon juice and zest, and vanilla and mix until smooth and creamy, making sure not to incorporate too much air into the frosting.

Natural Egg Dyes for Easter

Easter is here again, so time to dye eggs for hiding later in the day! No matter how old you are hiding Easter eggs never gets old and decorating them so much fun. If you didn’t get a chance to run out and buy the yearly dye kit no worries you have all ingredients at home to naturally dye eggs. We must thank Martha for helping us out this Easter, have a wonderful Easter:

Blue Homemade Egg Dye

Ingredients

1 pound frozen blueberries (about 3 1/2 cups)

2 cups water

1 tablespoon lemon juice

Directions

  1. On a stovetop, bring frozen blueberries and water to a boil in a pot. Boil for 5 minutes.
  2. Pour colored liquid into a cup or bowl, straining out the blueberries with a strainer.
  3. Stir in 1 tablespoon lemon juice.

Yellow Homemade Egg Dye

Ingredients

2 tablespoons turmeric

2 cups water

1 tablespoon vinegar

Directions

  1. On the stovetop, bring turmeric and water to a boil in a pot. Boil for 5 minutes.
  2. Pour colored liquid into a cup or bowl.
  3. Stir in 1 tablespoon vinegar.

Orange Homemade Egg Dye

Ingredients

2 tablespoons paprika

2 cups water

1 tablespoon vinegar

Directions

  1. On the stovetop, bring paprika and water to a boil in a pot. Boil for 5 minutes.
  2. Pour colored liquid into a cup or bowl.
  3. Stir in 1 tablespoon vinegar.

Pink Homemade Egg Dye

Ingredients

12 ounces frozen raspberries 

2 cups water

1 tablespoon lemon juice

Directions

  1. On the stovetop, bring frozen raspberries and water to a boil in a pot. Boil for 5 minutes.
  2. Pour colored liquid into a cup or bowl, straining out the raspberries with a strainer.
  3. Stir in 1 tablespoon lemon juice.

Brown Homemade Egg Dye

Ingredients

1/4 cup instant coffee granules

2 cups boiling water

1 tablespoon vinegar

Directions

  1. In a cup or bowl, stir coffee granules and boiling water together.
  2. Add 1 tablespoon vinegar.

Green Homemade Egg Dye

Ingredients

1 pound frozen blueberries

4 cups water

1 tablespoon lemon juice

2 tablespoons turmeric

1 tablespoon vinegar

Directions

  1. On the stovetop, bring frozen blueberries and 2 cups water to a boil in a pot. Boil for 5 minutes. Meanwhile, in a separate pot, bring turmeric and water to a boil. Boil for 5 minutes.
  2. Pour blue liquid into a cup or bowl, straining out the blueberries with a strainer. Stir in 1 tablespoon lemon juice.
  3. Pour yellow liquid into a cup or bowl. Stir in 1 tablespoon vineger
  4. Mix one part blue liquid with one part yellow liquid.

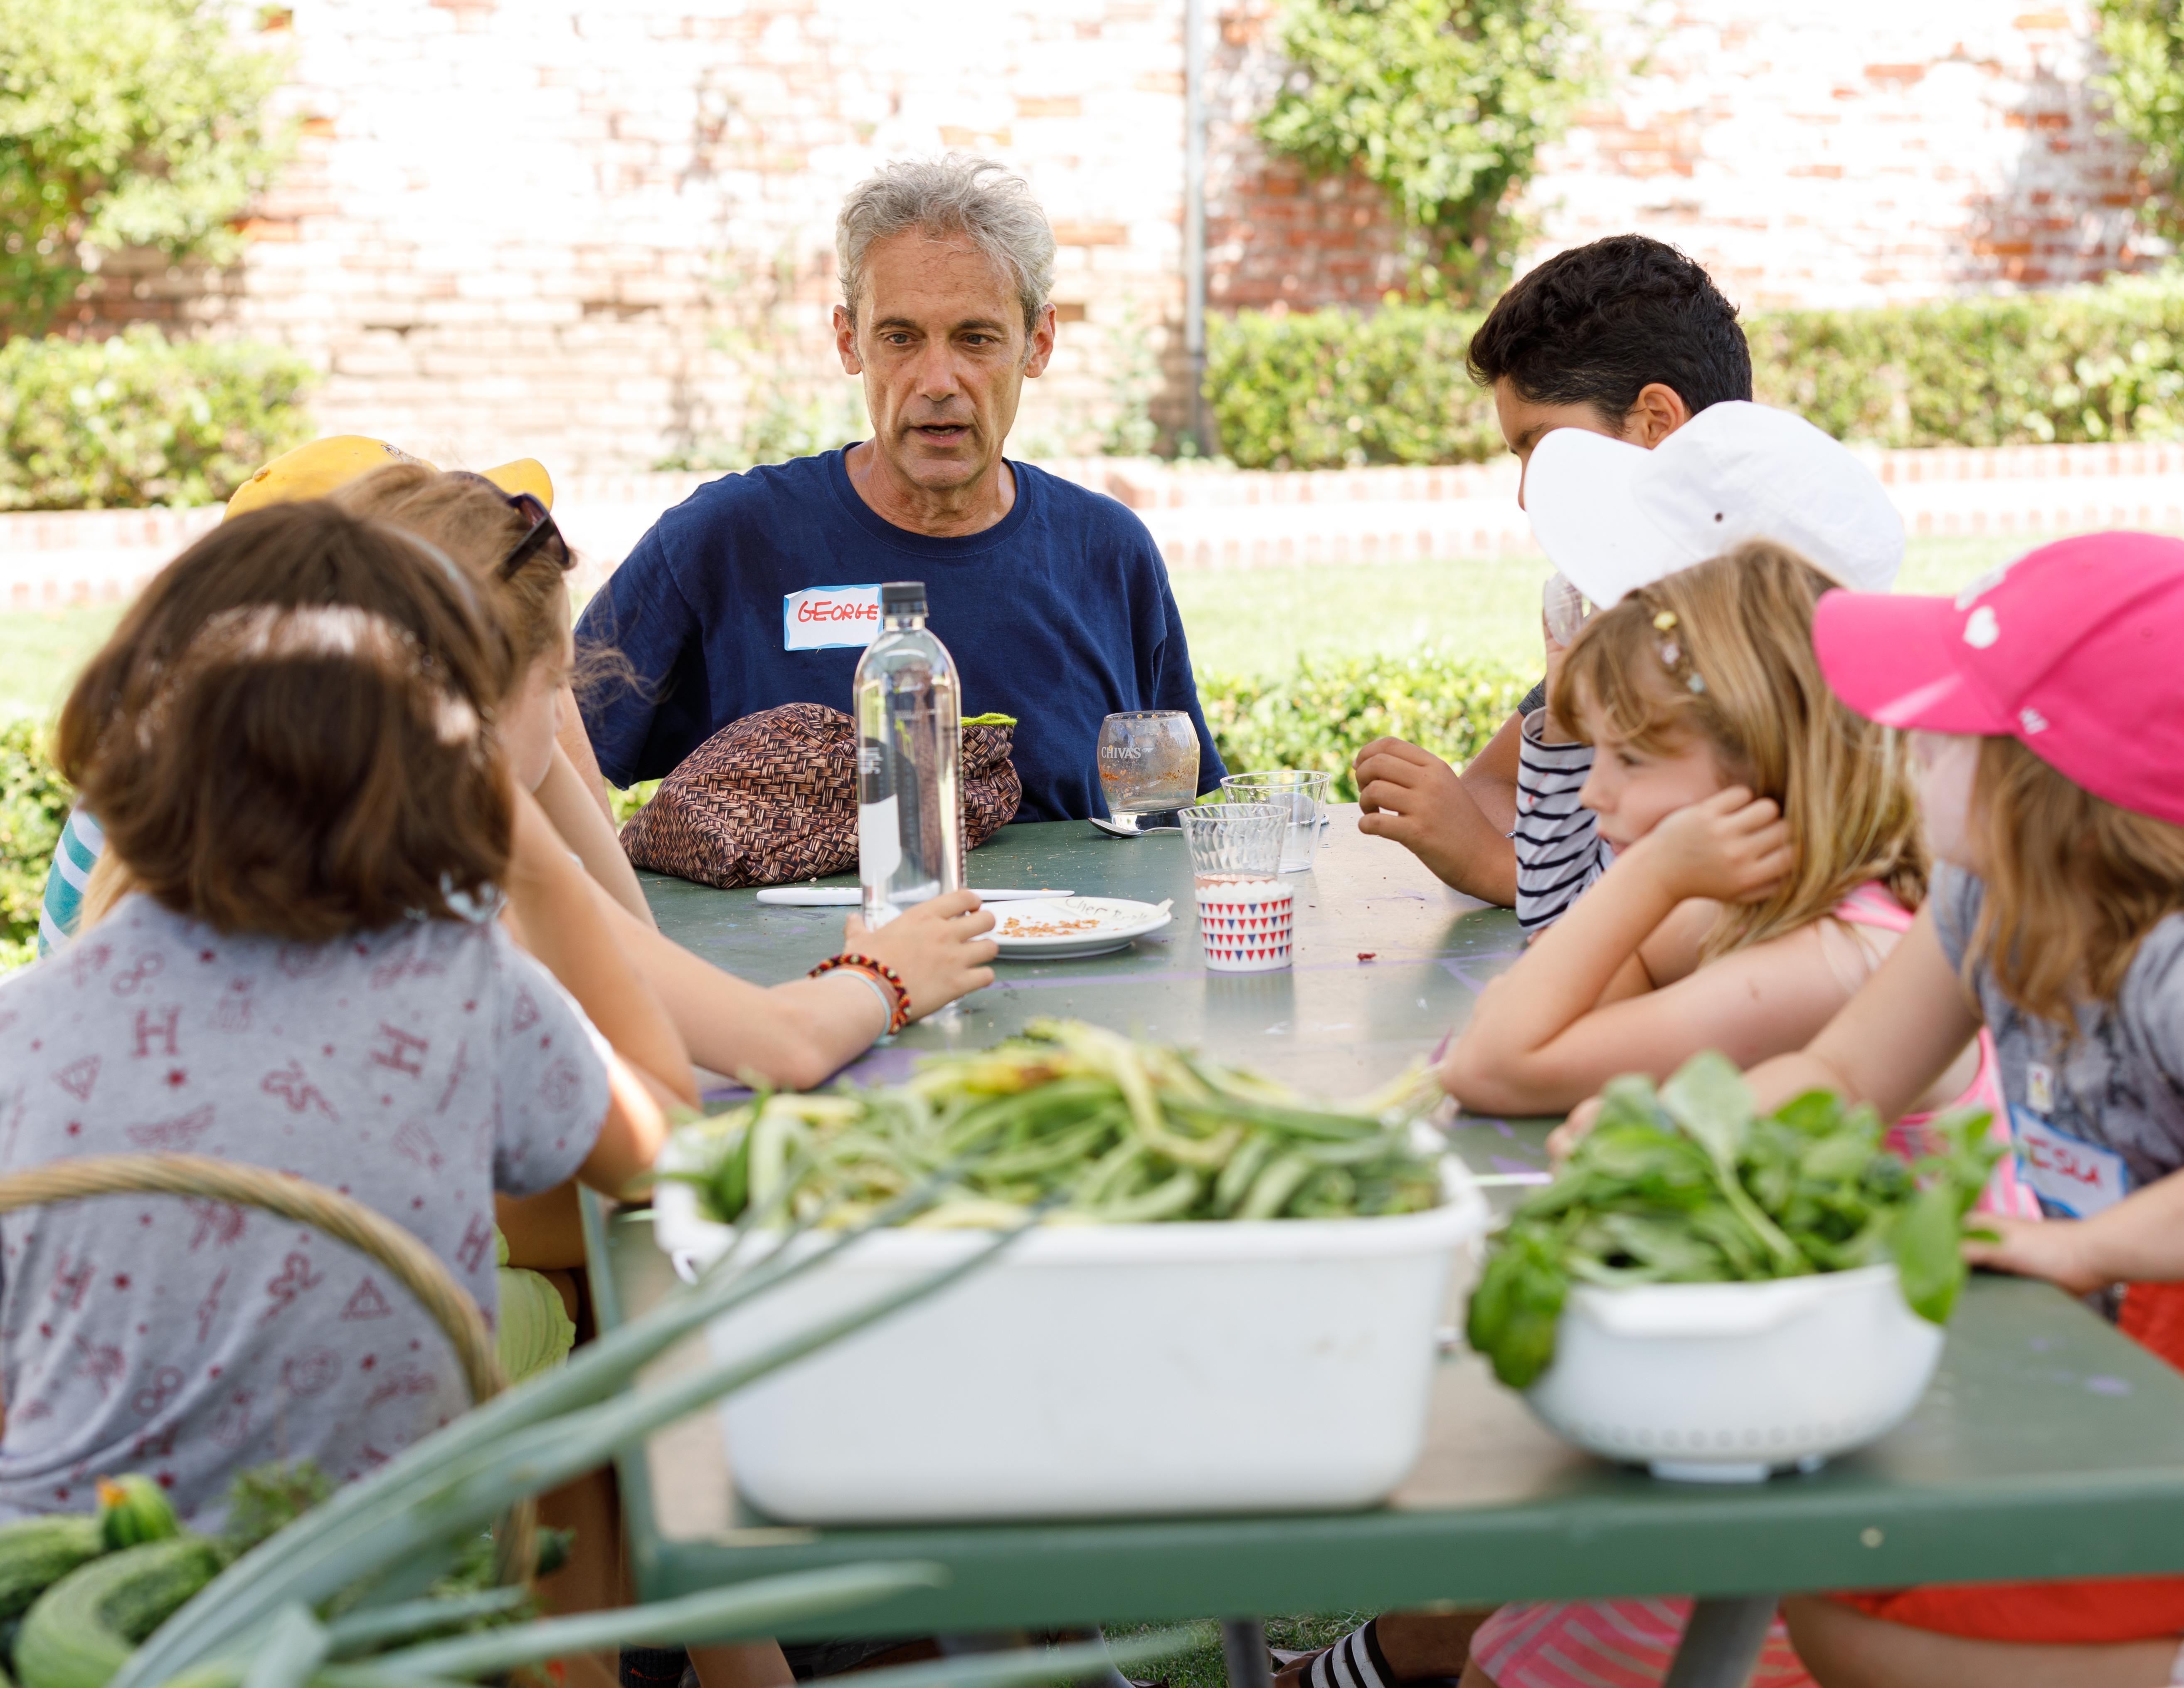
Greystone Gardening with George

WELCOME TO GREYSTONE DEMONSTRATION GARDEN!

The Greystone Demonstration Garden is a dedicated space for community gardening projects and education.  It’s approximately 2,000 square feet located at the lower Greystone Mansion & Gardens:  The Doheny Estate, owned by the City of Beverly Hills.  This garden allows individuals to come together and learn about organic gardening, the benefits of growing your own food and sustainable gardening practices. There are seasonal classes available highlighting current happenings in the garden.

Do you love gardening? Want to gain some new tips and tricks to use in your garden? Check out our new series, Greystone Gardening with George, and let your creativity fly! 

Greystone Gardening with George – Episode 1
Greystone Gardening with George – Episode 2
Greystone Gardening with George – Episode 3
Greystone Gardening with George – Episode 4
Greystone Gardening with George – Episode 5
Greystone Gardening with George – Episode 6
Greystone Gardening with George – Episode 7
Greystone Gardening with George – Episode 8
Greystone Gardening with George – Episode 9
LEARNING OPPORTUNITIES

Anyone can participate in the wonderful learning opportunities available throughout the year. We offer classes for gardeners of all ages. Below are some descriptions of classes offered in the past. 

1. Teen Gardening Class (ages 13-18)  
Learn this lifelong skill and grow your own food. Start seeds, learn how to care for plants, harvest your own veggies.

2. Container Gardening (Adults) 
Have a sunny balcony or porch? You can grow anything from apples to zucchini. Join us and learn to keep your potted pals happy.
 
3. Grow LA Victory Garden Classes (Adults) 
The University of California Cooperative Extension is organizing workshops in various communities throughout Los Angeles County to teach residents how to grow fruits and vegetables in their own backyard. Those who take all 4 classes will be given a certificate of completion.

4. Children’s Gardening Class (ages 6-12) 
Enjoy the spring season by harvesting vegetables, playing in the dirt, learning how to grow seeds and plenty of crafty projects.

5. Backyard Composting (Adults and Teens 13+) 
Reduce your carbon footprint and learn how to recycle your green waste into organic fertilizer. Traditional composting and worm composting both explored  

6. Virtual Gardening Workshops Available Now https://secure.rec1.com/CA/city-of-beverly-hills/catalog/index?filter=dGFiJTVCMzA4NCU1RD0xJnNlYXJjaD0=

VIRTUAL Container Gardening (5493)
SCHEDULE: 11a-Noon on Thu 04/08/2021

VIRTUAL What to Grow and When to Grow it (5494)
SCHEDULE: 11a-Noon on Thu 04/15/2021

VIRTUAL Seed Starting and Transplant (5495)
SCHEDULE: 11a-Noon on Thu 04/22/2021

VIRTUAL Irrigation, Organic Fertilizers, & Mulching (5497)
SCHEDULE: 11a-Noon on Thu 05/06/2021

VIRTUAL Garden Pest Control (5560)
SCHEDULE: 11a-Noon on Thu 05/13/2021

VIRTUAL Compost and Worm Composting (5496)
SCHEDULE: 11a-Noon on Thu 05/20/2021

 HOW THE GARDEN BEGAN:

Barbara Linder, a life-long resident of Beverly Hills and community advocate, approached the City of Beverly Hills in 2010 to develop a community garden project.  Her goal was to bring community members together to learn how to garden organically at home through learned activities while having fun outdoors.  As a result of her advocacy, construction on the dedicated space at Greystone Mansion began in 2012 and the Demonstration Garden was officially dedicated on April 13, 2014.

Over the years, individual gardeners, residents, students, 4-H Club members, Boy/Girl Scout troops, the City’s staff and administration, master gardeners and volunteers have worked together to create a garden space filled with raised beds, compost systems, espaliered fruit trees and water conservation features.

Junior gardener - one
VOLUNTEER OPPORTUNITIES

The Greystone Demonstration Garden is open year-round and seeks volunteers for various gardening tasks.  If interested, contact the Demonstration Garden at 310-285-6830.

DONATION OPPORTUNITIES

Future vision for the adjacent greenhouse and stables involves creating interior teaching spaces for workshops and classroom programs, a living museum and an event venue for the community.

To learn how to make a donation visit Charitable Gifting Opportunities or download the Beverly Hills Community Charitable Donation Form

 Greystone Mansion and Gardens 905 Loma Vista Drive, Beverly Hills, CA 90210 
310.285.6830 phone 310.858.9238 fax bhevents@beverlyhills.org 

Easy Easter Day Treats

Easter time is always a great time to have pinics and lots of great food, but Easter candy is the highlight of the day! No matter what your kids love peeps, chocolates, jelly beans, or marshmellow eggs making them part of a dessert is a win win. http://www.biglots.com has some great ideas and plenty of candy to make them happen check out these options:

EASTER PEEPS GARDEN CAKE

Ingredients

1 box devil’s food cake mix (or your favorite chocolate cake recipe)
1 container chocolate frosting
1 cup Oreo cookie crumbs
Green decorating icing
Orange decorating icing
8 to 12 PEEPS marshmallow bunnies
1 cup Coconut flakes
Green food coloring
Skewers and toothpicks


Directions

  1. Make cake as directed in 13×9 inch pan sprayed to be non-stick.
  2. Let cake cool. Spread chocolate frosting on top of cake. Draw lines with skewers to map out rows and spots for carrots.
  3. Sprinkle crushed Oreo over cake
  4. Add a few drops of green food coloring to coconut flakes
  5. Add green coconut to create grass
  6. Add carrots with orange and green decorating icing
  7. Put a toothpick in each PEEPS marshmallow bunny and add to garden

PEEPS FUNFETTI CAKE

Ingredients


1 box Pillsbury Funfetti Cake Mix
Pilsbury Funfetti Vanilla Frosting
2 boxes Peeps Party Cake Marshmallow Chicks
Cadbury Mini Eggs
2 cups Let’s Do Organic Unsweetened Shredded Coconut
Yellow & blue food coloring
Round cake pan
Nonstick spray

Directions

  1. Preheat oven to 350°F
  2. Coat round cake pan with nonstick spray, set aside
  3. Prepare Funfetti cake mix according to the instructions on the package & bake in round cake pan
  4. Add 2 drops of yellow coloring & 2 drops of blue coloring to frosting, mix to combine
  5. Mix coconut, 2 drops of yellow coloring, 2 drops of blue coloring in a medium mixing bowl
  6. After cake has completely cooled, cover with pale green frosting
  7. Stick Peeps to frosting around the bottom edge of cake
  8. Pat coconut into remaining frosting
  9. Top with Funfetti sprinkles & Cadbury Mini Eggs
  10. Delight in your Easter treat

COOKIE DOUGH EGGS

Ingredients


½ cup butter
¾ cup brown sugar
2 tsp vanilla
¼ tsp salt
¾ cup flour
2 tsp milk
½ cup powdered sugar
½ cup mini chocolate chips
18 oz chocolate baking chips
6 oz white chocolate baking chips
Food coloring

Directions

  1. In a mixing bowl, stir together softened butter and brown sugar. Add vanilla, salt, flour, milk and powdered sugar.
    Mix until well combined. Gently stir in mini chocolate chips
  2. Scoop dough into 1 inch balls and shape into eggs. Place on parchment lined baking pan.
  3. Freeze for two hours.
  4. After two hours, melt the chocolate almond bark – directions on package.
  5. Dip the frozen eggs into the melted chocolate. Shake off any excess and place on parchment paper to dry.
  6. Melt white almond bark and add desired food coloring. Drizzle chocolate over the egg using a fork.

EASTER PEEPS S’MORES

Ingredients

Great Gatherings 11.5’’ Cast Iron Pan
1 bag Ghirardelli Semi-Sweet Chocolate Chips
1 bag of Reese’s Peanut Butter Eggs
1 box Peeps Yellow Marshmallow Chicks
1 box Peeps Pink Marshmallow Bunnies
1 box Peeps Blue Marshmallow Bunnies
1 box Honey Maid Graham Crackers
1 tbs butter

Directions

  1. Preheat oven to 450°F
  2. Grease pan with butter
  3. Pour chocolate chips into pan & flatten as needed
  4. Arrange 6 Reese’s Eggs evenly on top of the chips
  5. Top with Peeps, arranging the colors however you like!
  6. Place pan in the oven & bake until Peeps begin to brown lightly, about 6-7 mins (Watch closely! The Peeps brown quickly!)
  7. Serve while warm with graham cracks for dipping!